As someone who loves a good meal, cooking one, came to me as a natural passion. I belong to a family where meal times consisted of not just food, but also noisy conversation centered around the events of the day and discussing the menu for the next. (ah yes, we are a greedy lot! )

For the most part of my life so far, my contribution in the kitchen was assisting mom and my duties were limited, to chopping veggies and laying the table. Then along came the great Indian wedding, and I was suddenly the queen of my very own kingdom. My curiosity about this magical world, coupled with an enthusiastic sous-chef (my husband, Vineet), led me to take on the challenge of preparing meals on a daily basis, and not succumbing to the convenience of hiring a cook.

This blog is a product of my experiments with food (not all are life threatening :D) for my fellow culinary enthusiasts - especially the newly weds and hungry bachelors and is dedicated to the women who've inspired me in the kitchen;
Aji (s),Ma and Nigella Lawson.

Showing posts with label Desserts and Treats. Show all posts

Sunday, April 7, 2013

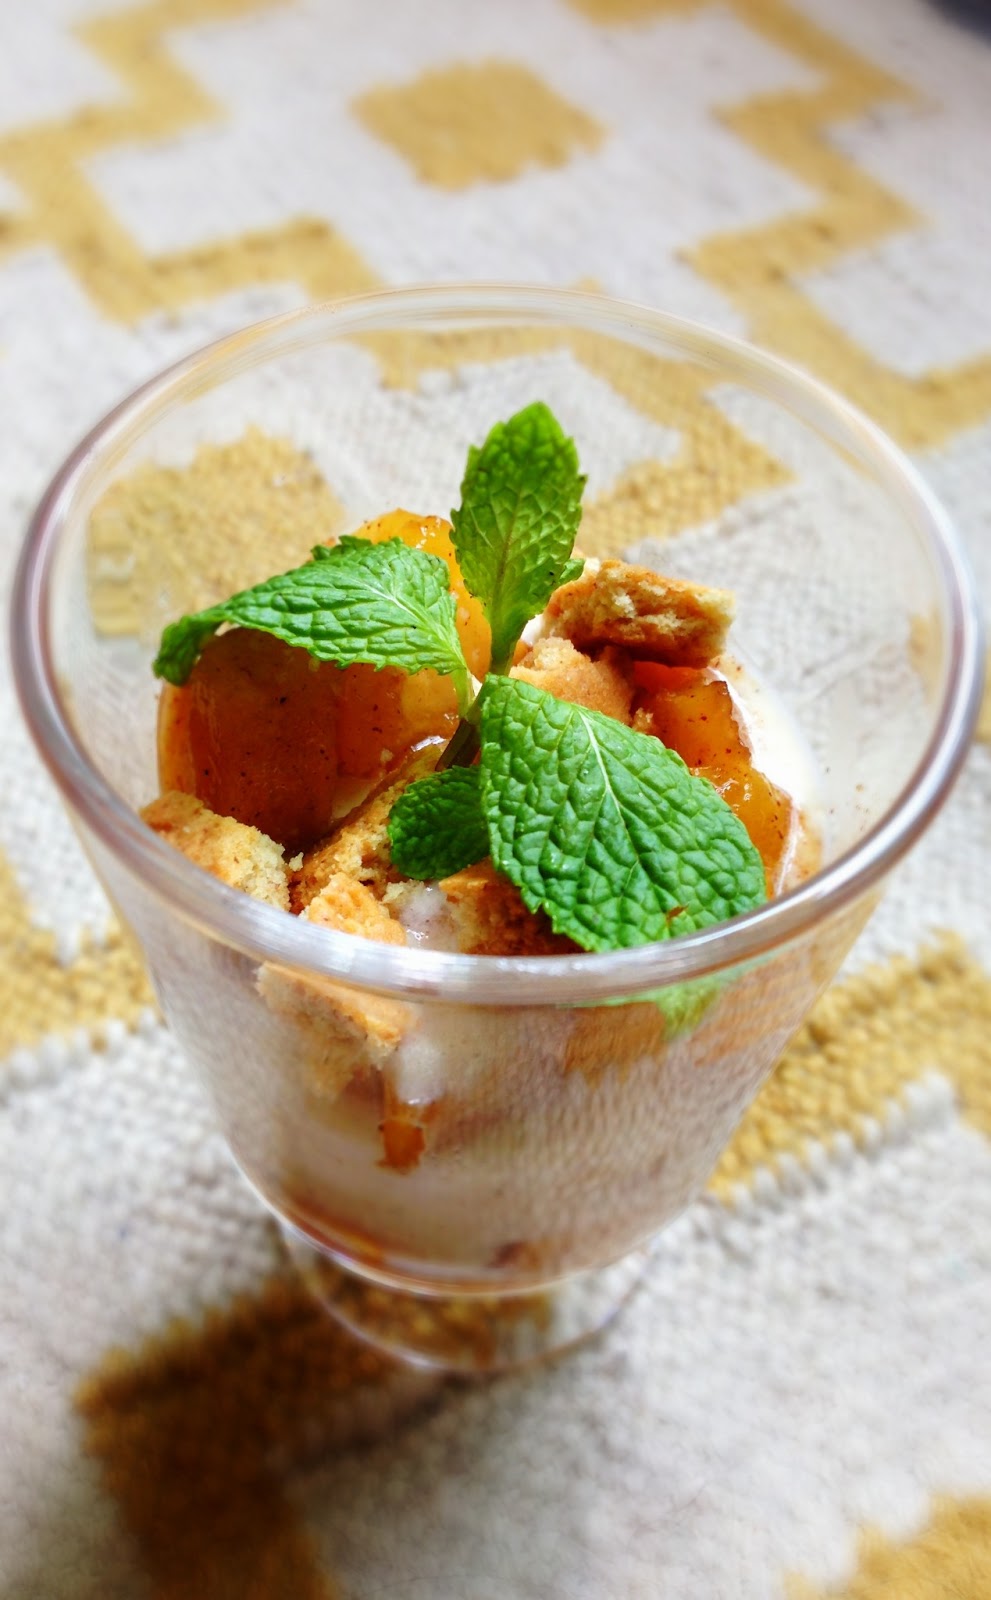
Cinnamon Grilled Peach with Ginger-Brandy Whipped Cream

Dessert unarguably is the high point of any party. It's rare to find someone who doesn't enjoy indulging in a light, sweet treat to conclude a scrumptious meal. Since Keya is now old enough for solids, I excitedly bought a huge box of super yummy and juicy Yellow Peaches for her only to realize, that they'd go all squishy at the rate she would consume them. 
So when we invited our friends Tuhin & Anushree over for Sunday lunch, I decided to use the Peaches to whip up a simple yet decadent dessert. 
My first thought was to make a Peach cobbler. I then recalled an episode from one of Bobby Flay's shows where he grilled peaches marinated in Cinnamon sugar. I also recalled falling head-over-heels in love with the gorgeous grill marks on the fruit when he served them up with mint leaves. The decision was made and out came my stove-top grill pan.
I wanted to dress these up a little more, so I created a whipped cream topping, spiked with Ginger and Brandy. As I went along, I also felt it could also use something extra in terms of the textures one would get in a single bite... so in went some toasted digestive biscuits and ginger snaps. The result, was a delicately sweet, delish dessert that is now one of my proudest creations :)
Ingredients: (Serves 6)
- 6 Peaches, ripe but firm, washed
- 2 tsp Olive oil
- 3-4 tsp super-fine Sugar
- 1 tsp powdered Cinnamon
- 1+1 tsp Ginger powder ( only 1tsp if using Ginger biscuits)
- 2 to 3 tbsp Brandy
- 1 cup double Cream
- 6 to 8 Ginger biscuits OR Digestive biscuits
- Mint leaves, to garnish


You will also need-
- A pastry brush
- 6 clear serving glasses (could use juice glasses) 
- An electric beater or balloon whisk to whip the cream.


Method:

1.) Bring a large pot of water to a rolling boil. Turn down the heat and let the water simmer. Cut an X-mark on the Peach as shown in the photo. Drop the Peaches into the water. Ensure that the fruit is completely submerged in the water. Blanch the Peaches for about 45-50 seconds, till the skin wrinkles and appears to loosen.

Using a slotted spoon gently rescue the Peaches from the hot water and drop them into a bowl of cool water (this stops them from cooking). Drain the peaches and pat dry. Peel the cooled Peaches.


2.) Slice the Peaches in half and remove the stone/ seed. Then cut into thick-ish wedges. Set the wedges onto a plate. Using a pastry brush, coat the slices slightly with the Olive oil. 

3.) Heat the grill pan. Using a pair of tongs, gently arrange the Peach wedges and grill till the peaches take on a golden brown colour and dark brown grill marks. Carefully flip the wedges to form grill marks on the opposite side. Turn off the heat and transfer the grilled peaches to a chopping board and allow them to cool. Dice into smaller cubes. Sprinkle the powdered Cinnamon and gently toss to coat the Peaches evenly. Chill in the refrigerator till its time to use.

4.) In a bowl, whip the double cream along with the super-fine Sugar, 1 tsp Ginger powder and the Brandy. Allow the whipped cream to chill in the refrigerator for a few minutes.

5.) Using your fingers break the Ginger biscuits into chunks. If using Digestive biscuits, break into chunks and sprinkle with the remaining 1 tsp of Ginger powder. Toss to mix.

6.) Arrange the serving glasses. Place a couple of spoonfuls of diced Cinnamon-marinated Peaches in each. Add a dollop of the Ginger-Brandy Whipped cream, followed by the crumbled biscuits. Repeat the layers till desired portion sizes are achieved, allowing the topping layer to be that of diced peach and crumbled biscuit. 

Place the glasses in the refrigerator for atleast an hour or two to chill.

7.) Garnish with fresh mint right before you serve.


Sunday, February 3, 2013

Banana Bread

All of us at some point in time, have had a bunch of bananas lying around the kitchen, going brown. You keep telling yourself, I better finish those, before they go smushy... then, another day goes by...and now they just plain gross... not only are they an unappetizing brown to look at, but they are also simply PERFECT to bake with! Adapted from the original Martha Stewart Banana bread recipe, this cake-like bread, is great as a weekend (or mid week!) breakfast treat, and works great when paired with a steaming cup of tea or coffee.
So, stop feeling bad about letting the bananas go brown, and bake with them instead! :)

Ingredients: (Makes 1, 9"x4" loaf)
Dry mix:
- 1 cup All-Purpose Flour
- 1 tsp Soda Bicarb
- 1/2 tsp Salt
- 1/2 tsp ground Nutmeg
- 1/2 tsp ground Cinnamon

Wet mix:
- 1/2 cup Butter, softened @ room temperature
- 1/2 cup Sugar
- 2 Eggs @ room temp
- 1/4 cup plain Yoghurt+ 1/4 cup Water (buttermilk)
- 1 cup mashed Bananas + 1 tsp Vanilla

Optional additions: Chopped or slivered Almonds & Golden raisins


Method:
1.)  Preheat the oven to 180 deg C. Grease and dust a 9x5" loaf pan. Sift the ingredients of the dry mix together and set aside.

2.)  Cream the butter and sugar in a bowl till light and fluffy. Add the eggs one at a time and beat lightly after each addition.

3.)  Add the mashed Bananas+ Vanilla extract. Add the Buttermilk and dry mix to the bowl, alternating each addition.... i.e. little of the dry mix, followed by some of the buttermilk... repeat.

4.)  Pour the batter into the loaf pan and bake for about 55-60 mins or till a cake tester comes out clean.

5.)  Allow the Banana bread to cool in the pan. Run a butter knife along the edges and loosen. Turn out onto a wire rack and let it cool completely. Best stored in an airtight container in the refrigerator, in case the weather is warm.

Slice up and enjoy with a generous slather of Cream cheese & a cup of coffee! 

Monday, January 2, 2012

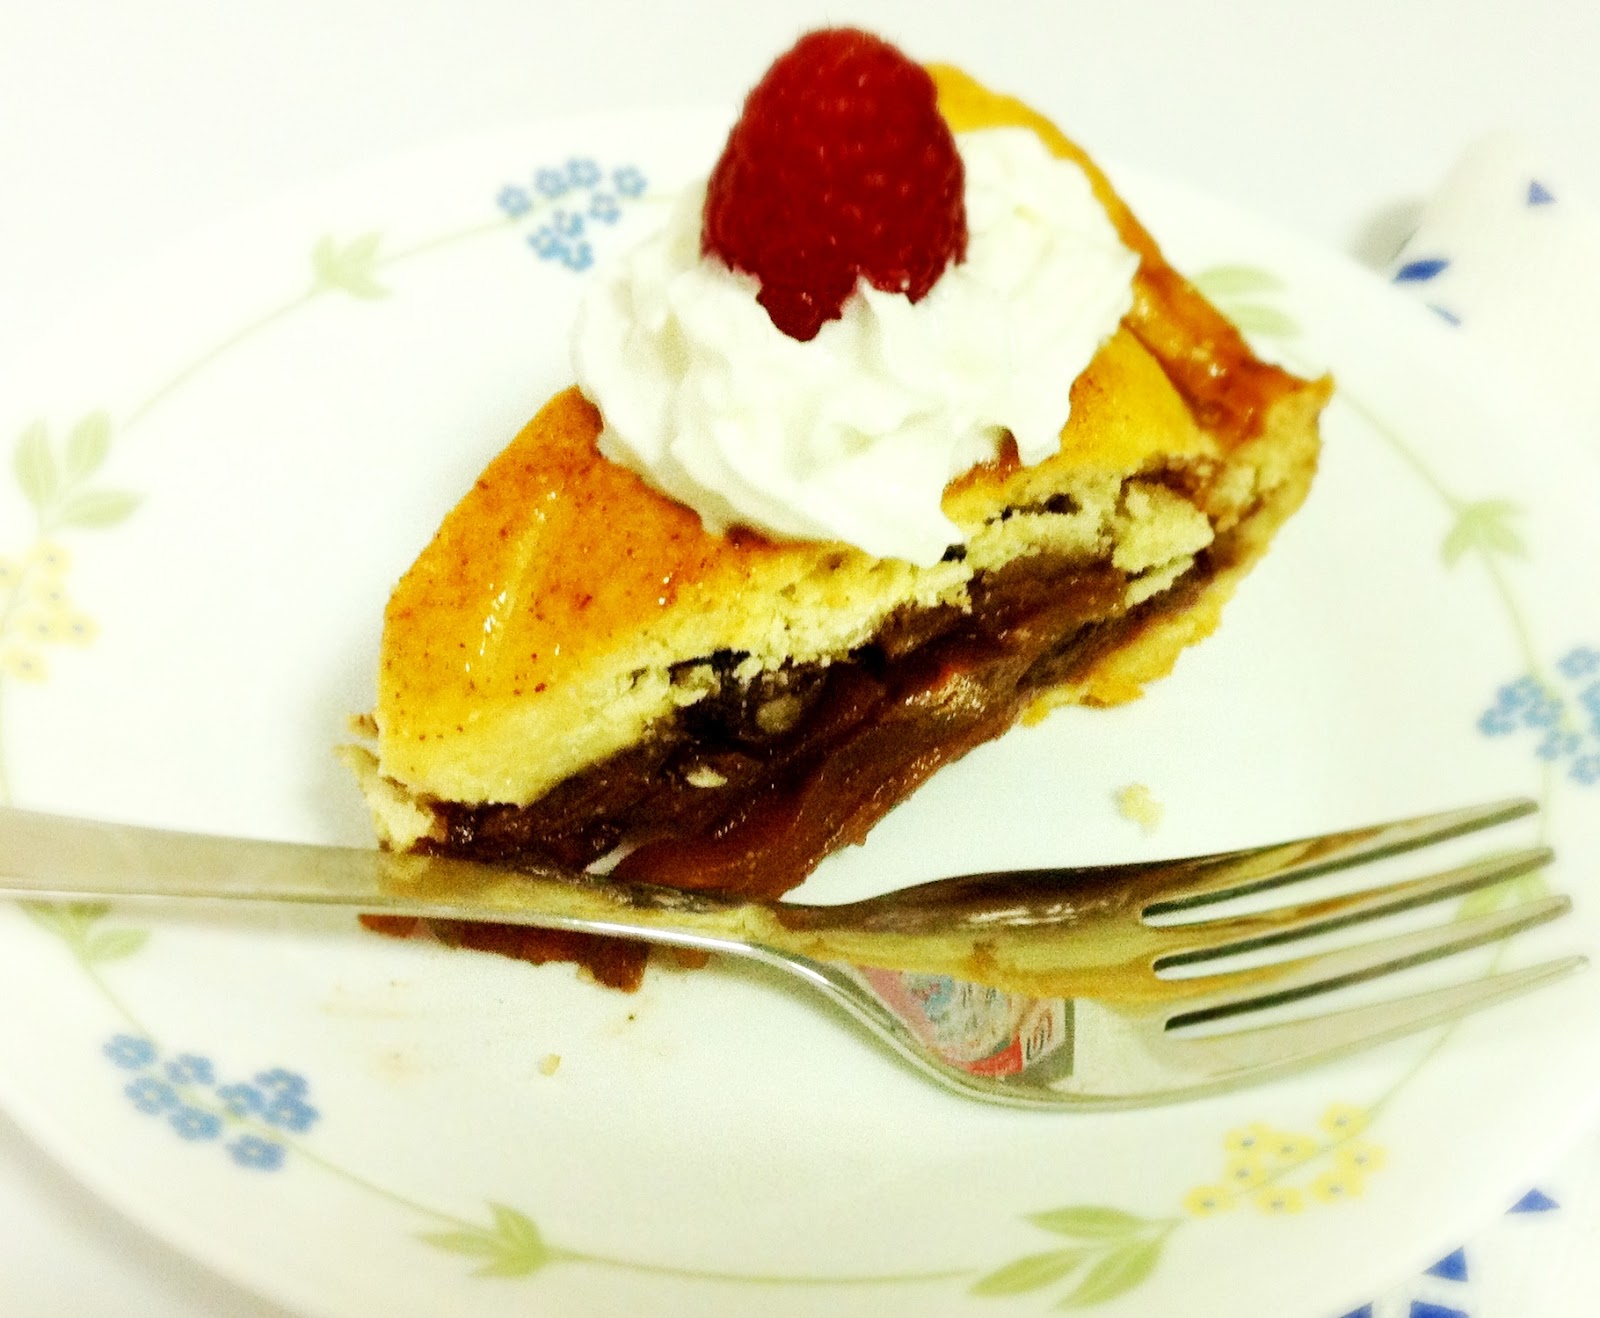
Wicked Apple-Cherry-Whiskey Pie with whipped cream & Berries


 While the last year decided to zip by all of us in the blink of an eye, 2012 made a quiet yet fun entry into our lives. Much like last year, I was in the mood to try out some exciting food to treat ourselves to as we celebrated the last evening of 2011 with friends over drinks, great food and all night poker...
For the past few months now, I've been wanting to bake a pie from scratch... crust and filling. So when I came across beautifully crisp Granny Smiths (what green apples call themselves when they want to be fanciful) I knew it had to be an Apple Pie. I used a very simple, very basic pie crust recipe, which came from reading a LOT of pie recipes with a deliciously wicked sweet-sour-cinnamon-y filling with a serious whiskey kick... I cannot insist enough, that you go try this one this coming weekend !


Ingredients: For Crust
- 2 cups All-purpose flour
- 3/4 cup powdered Sugar
- 1-1/2 tsp Baking powder
- 1/2 tsp Salt
- 3/4 cup chilled unsalted Butter
- 1/4 cup iced Water + more

Ingredients: For Filling
- 6 medium sized Granny Smith apples
- 1 cup dried Cherries (pitted)
- 1/2 cup Scotch whiskey
- 1/2 cup golden brown sugar
- 2 heaped tsp, ground cinnamon
- 1/2 Lime

Whipped cream & blueberries & raspberries to serve.

Special Equipment:
- Food processor / Mixer
- 1 x 9" Glass / Teflon coated / Aluminum foil Pie dish
- Aluminum foil , to protect edges of the pie while baking
- Plastic wrap


Method: For Crust
1.) Place the first four ingredients in the food processor and pulse 3-4 times till well combined. Add the butter and pulse again till a coarse bread-crumb like texture. Start adding the iced/ chilled water little-by-little till moist clumps are formed. Add a couple of more teaspoons of the water till a dough is formed.
2.) Turn out the slightly sticky dough onto a floured surface. Dust your hands with some plain flour and knead the dough into a smooth ball. Dont over-knead, or the heat from your hands will begin to soften the butter. Divide the dough in half. Wrap in plastic wrap and flatten between your palms into a disk. Chill in the refrigerator for about 40-50 minutes.

Method: For Filling
1.) While the dough chills, marinate the dried cherries in the Scotch. Set aside for about 30 mins.
2.) Peel and core the apples. Cut in half and make thin slices. Squirt some lime juice over them to keep them from oxidizing. Stir in the golden-brown sugar and ground cinnamon.
3.) Stir in the marinated cherries along with the whiskey . Toss the apples and cherries together.

To assemble pie:

1.) Roll out one of the chilled dough disks on a lightly floured surface till its about 13" in diameter.... should be large enough to fill the pie dish base and sides with about 1/2" extra all around to help "crimp" the crust.


2.) Gently lift the rolled out dough and lay into the pie dish. Press down super gently with your fingers to make sure that the crust is even.

At this point, preheat your oven to 190 deg C (375 deg F).


3.) Arrange the sliced apples in a spiral fashion and distribute the cherries evenly through out the filling. Retain the whiskey-cinnamon juice - I used this to make the glaze.

For glaze, heat these remaining juices in a saucepan. Let it bubble away till it begins to get sticky and thicken. Switch off heat and let it cool slightly.


4.) Pull out the second dough disk. Roll out to make the top crust. Dust hands lightly with flour. Pick up the rolled out dough gently and lay it over the filled pie. Using your fingers pinch the edges of the pie to seal in the filling.

Using a sharp knife, make small cuts all over the pie shell. These will help the steam from the fruit escape, and prevent a apple explosion in your kitchen ;) 

5.) Brush the cooled glaze all over the pie - EXCEPT on the crust.

6.) Bake at 190 deg C for about 10 minutes. Remove from oven and cover the edges of the pie with aluminium foil. Pop the pie back in the oven and bake for another 50 minutes, till apples are tender and crust is golden.

7.) Allow the pie to cool till warm / or room temperature - whichever you prefer.

I like it slightly warm because I love the contrast of the warm pie against the cool whipped cream and berries.


Eat up greedily, licking off every crumb off the plate.... (probably don't need to tell you that! )

Sunday, September 11, 2011

Coconut- Date- Sesame Fudge Bars


I recently came across a recipe for Raw Fudge Brownies, that a friend from school, Reshma, made and posted on the blog she writes for healthy eating & living. Her recipe got me all excited about using dates in desserts, since they're not only gooey and deliciously fudge- y  but packed with several key nutrients like Vitamins, Calcium, Iron,Potassium and Magnesium. They're an excellent source of fiber and help maintain top-notch digestive and cardiac health.
I had a LOT of dessicated coconut in my freezer from last weeks coconut cupcake, so I decided to experiment a little... and since I was looking to make this healthy, I added some Oat cereal and Cornflakes.
So, well, here it goes, my Date-Coconut-Sesame fudge... sticky, gooey, yummy ... and healthy :)


Ingredients:
2 cups seedless Dates (khajoor), roughly chopped
5-6 dried Apricots (optional), roughly chopped
1 cup unsweetened Dessicated coconut
1 cup breakfast Cereal - Cornflakes / Oat cereal (either or both)
1/2 cup Pine nuts / Or / roughly chopped Almonds
1/2 tsp Honey
3-4 tbsp Sesame seeds

Method:
1.) Preheat oven to 180 deg C. Toast the Cornflakes and/or Oat cereal for 5-6 mins till they're super crunchy. Alternatively, heat a non-stick pan on medium heat. Toast the cereal stirring occasionally till its crisp. Set aside in a dry bowl to Cool.

2.) Toast the Pine nuts/ or / chopped almonds. Add to the bowl with the toasted Cereal.

3.) Now, toast the dessicated coconut till it begins to turn slightly golden. Switch off heat immediately or it will brown too much.


4.) Transfer the toasted Cereal and Nuts into a mixer / food processor. Pulse till coarsely powdered. Start adding the dates, about 1/4 cup at a time, and pulse till combined after each addition. As you pulse, the stickiness of the dates will begin to bind the mixture together.


5.) Add the toasted dessicated Coconut to the date mixture 1/4 cup at a time, and pulse again till well combined. Although it binds extremely well, this mixture is surprisingly non-sticky,and pulls away from the sides of the mixer very easily.


6.) Line a baking tray/ glass casserole with grease-proof paper or aluminum foil. Turn out the mixture into the bowl. Using your fingers , apply pressure on the mixture, and flatten into the bowl to form a layer which is uniformly thick (about 1/2" thick).


7.) Cover with a lid or foil and chill in the refrigerator for about 30-45 minutes. Meanwhile, toast the Sesame seeds and cool. Brush the honey lightly, over the top of the set fudge. Lightly pat the toasted Sesame seeds onto the fudge using slight pressure from your fingers to stick.
Holding the foil, extract the fudge from the bowl. Using a sharp knife, divide into 2" x 2" squares ( or 1" x 3" rectangles).

Store in an air-tight container in the refrigerator. Should keep well for about 7-8 days, but that's IF it lasts that long! :)


Sunday, September 4, 2011

Jam-filled Fun cookies

As a kid, I was a big fan of jam cookies. My favourite part would be to open the cookies, lick off the filling and sham on eating the now, not-so-interesting shell :)
So I figured, that since some childhood favorites never change, to make Tania's (my friend and host of the BBQ party that I went to earlier this week) son a little treat to enjoy all on his own once the party was over :P, except these cookie shells with the lemon zest is equally yummy!

This recipe makes about 30 filled cookies.

Ingredients:
- 3/4 cup Sugar
- 3/4 cup + 2 tbsp Butter, softened
- 2 tsp grated Lime zest
- 1 Egg yolk
- 2-1/4 cups All purpose Flour
- 1/4 tsp Salt
- 1/4 cups each of assorted Jams ( I used strawberry, black cherry & orange)


Method:

1.) Beat the butter + sugar + lime zest till fluffy. Crack an egg and separate the yolk from the egg white. Add the Egg yolk and to the mixing bowl along with the salt. Beat again on a medium speed.


2.) Spoon in the flour little by little and beat lightly till a dough begins to form. Resist the urge to over-beat the mixture. Turn out the dough onto a floured surface. And knead well till it forms a soft yet firm ball of dough.


3.) Divide the dough into four equal balls. Wrap each ball separately in clear plastic wrap. Flatten the ball slightly by pressing between your palms. Chill in the refrigerator for about 30 minutes.


4.) Pull out one of the 4 flattened dough balls. Line your board or counter-top with grease-proof paper. Warm the dough ever so slightly between your palms to make it more pliable.

Unwrap the dough from the plastic wrap and place it on the board. Lay the plastic wrap over the dough and gently roll out the dough till its about 3-4 mm thick.


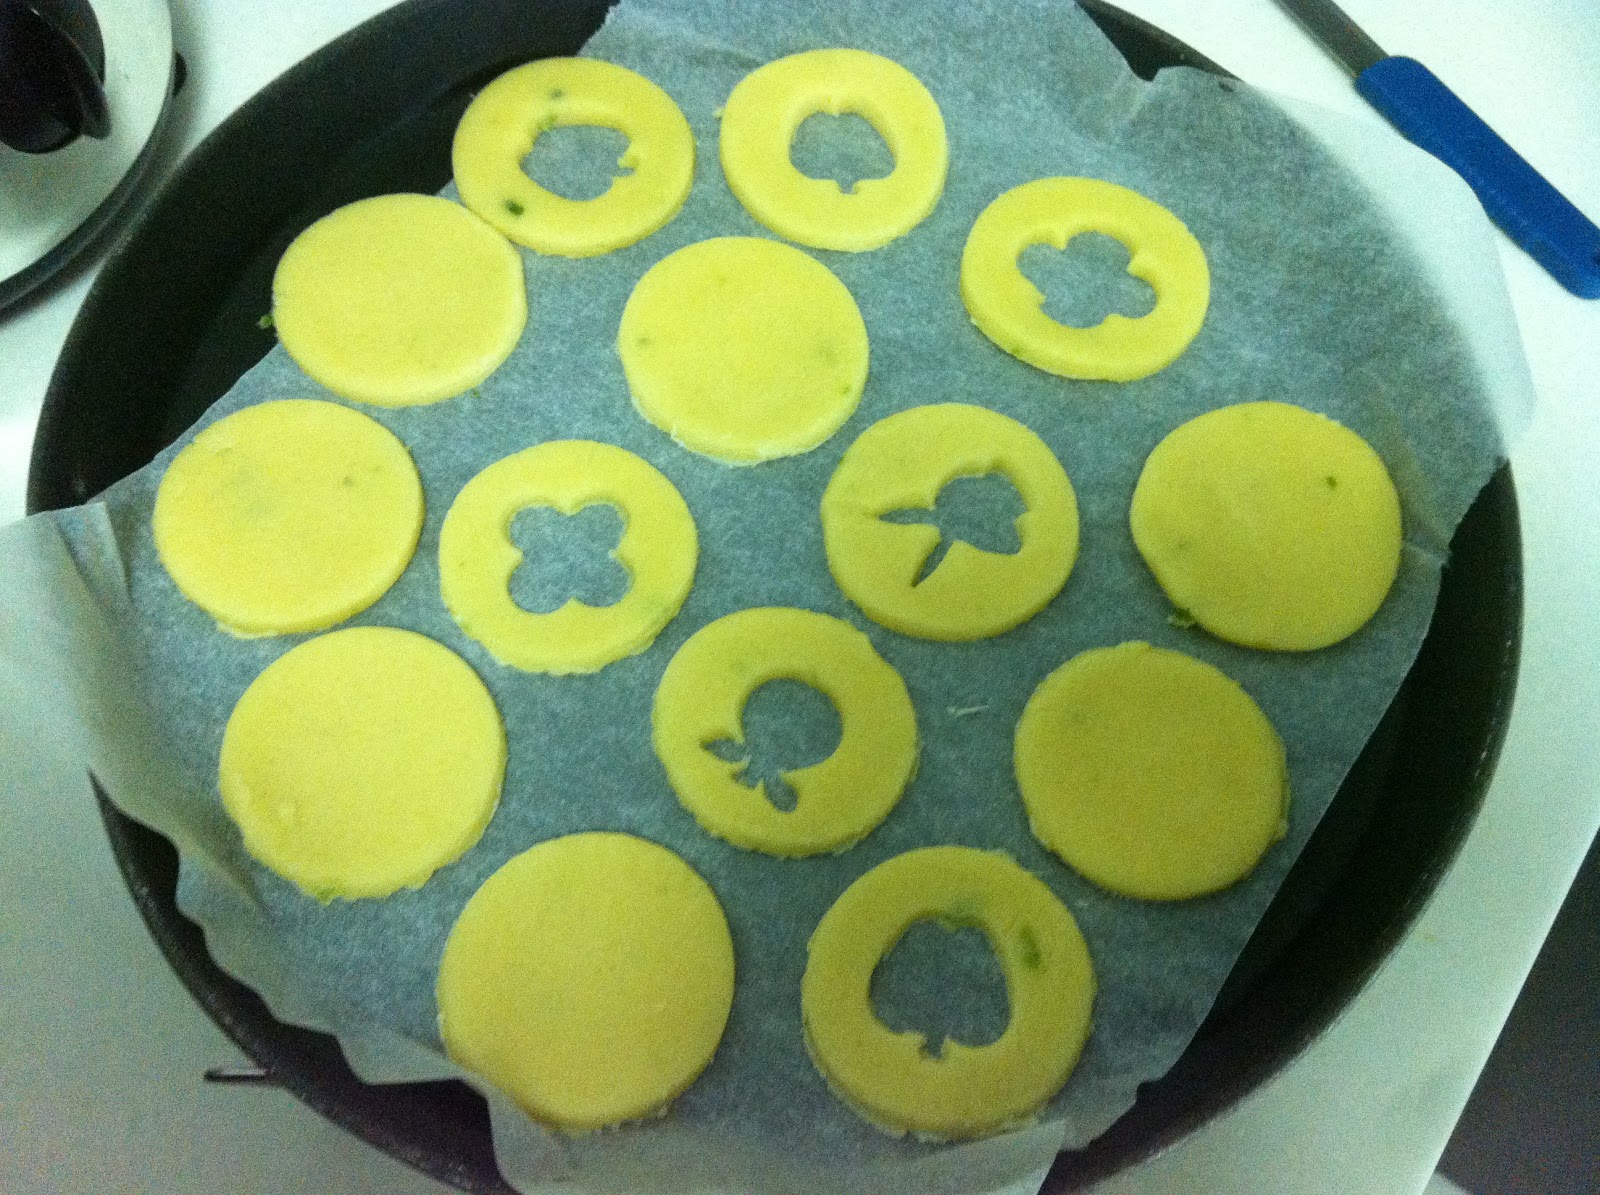
5.) Using a cookie cutter cut out the larger circular (or any shape of your choice) shapes. Divide the round cookies into 2 sets. Using the smaller cookie cutters, cut out shapes from within the round cookies of one set.

Ensure that you have the same number of plain and cut-out cookies.


6.) Knead the scraps of dough together and roll into a ball. Wrap in the plastic wrap and pop it back into the refrigerator to chill.


7.) Arrange the cookie cut-outs on a grease-proof paper and bake in an oven preheated to 180 deg C for about 8-10 minutes. These cookies are still a little soft when fresh out of the oven, but they harden as they cool.


(Alternatively,the cookie cut-outs can be frozen at this stage to be baked at another time.)
Repeat the rolling, and cutting process with all the of the dough. Make sure that the dough is always cold yet pliable.


8.) Once you're done with cutting out all of the shapes, get started with the Jam. Heat the jam along with 5-6 tbsps of water in a non-stick saucepan. Whisk as the jam heats an make it into a liquid jelly like consistency. Switch off the heat and allow the jam to cool. The jam with thicken and become stickier as it cools.

9.) Make pairs of the solid and cut-shape cookies. Spoon some jam onto the plain round cookies and sandwich using the cut-out cookie on top. Gently press together to stick and lay on a wire rack to set completely.

These cookies will keep very well for about 10 days when stored between layers of grease-proof paper in an air-tight container. Eat up! :)


Coconut cupcakes with Citrus-Cream cheese frosting

Earlier this week, I attended a really fun BBQ party at my friend Tania's place. I knew she'd be going all out with her prep for this party and I felt like I wanted to take her a little treat... actually... I just needed an excuse to spend my day in the kitchen, with my precious oven :)
So my day was spent making cupcakes and cookies my two most favorite things to bake! Cupcakes, for the party and Jam-filled cookies for Aarav, Tania's adorable 3 year old son :)

A while ago, I was watching a baking contest on "The Ultimate recipe Showdown" on the Food Network where a contestant attempted a Pina Colada inspired cake... It had coconut, fresh pineapple and a generous proportion of alcohol... Now, I love Pina Coladas, but I wasn't about to feed a bunch of kids (including Aarav) alcohol -spiked cupcakes...!
So, I left out the booze and used cream cheese on the frosting instead...

Cream cheese is the easiest ingredient to use on a cupcake frosting. It works brilliantly with a citrus-y flavour and is naturally creamy...and was a nice compliment to the coconut in the cake.

This recipe makes about 25-28 cupcakes.

PART 01/02: THE CAKE

Wet Ingredients:
- 2 cups unsalted Butter, softened
- 1-1/2 cups Sugar
- 5 large Eggs @ room temperature
- 1-1/2 tsp Vanilla extract
- 1/2 cup Buttermilk
- 1/2 cup Coconut milk (thick)

Dry Ingredients:
- 3 cups all-purpose flour (maida)
- 1 tsp Baking powder + 1/2 tsp Baking soda
- 1/2 tsp Salt
- 1 cup shredded Dessicated Coconut, plus an extra half cup for decorating later


Method:


1.)  Preheat your oven to 170 deg C (325 deg F). Cream the softened butter and sugar first on medium speed and then on high till light and fluffy.
Crack the eggs into the batter. One by one into the batter. Beat the batter to mix eggs after adding each addition.
Add the Vanilla extract and beat again. Set aside the bowl.


 2.) In a separate bowl, sift together the flour, baking powder, baking soda and salt. Set this dry mix aside.In a bowl whisk together the buttermilk and coconut milk.

Mix the flour mix and buttermilk mix into the egg batter alternating each addition. i.e. add the flour + followed by the buttermilk mix + repeat flour + repeat buttermilk + add the remainder of the flour mix.

 
3.) Line a cupcake tray with paper liners. Spoon the batter into the cups and bake in an oven preheated to 170 deg C for about 25-30 mins, or till a cake tester comes out clean.


 4.) Transfer the baked cupcakes onto a wire rack and allow them to cool and come to room temperature. Bake the rest of the cupcakes and allow them to cool completely before you frost them.


PART 02 / 02: THE FROSTING

Ingredients:
1 cup Cream cheese @ room temp
2 tbsp unsalted Butter @ room temp
Grated zest + Juice of 1 medium Lime
6-7 tbsp of Icing (superfine) Sugar ( add more if you want it sweeter)
Few drops of Green apple food colouring


Method:

Cream together the cream cheese, butter till light and fluffy. Add the lime juice,  freshly grated lime zest and the green food coloring and cream again. Chill for about 30-45 minutes before using. 

DECORATING THE CUP CAKES : 


 Using a butter-knife or a flattish spoon, slather the frosting onto the cooled cupcakes. 

Sprinkle on the dessicated coconut and decorate the cup cake with a slice of fresh green lime... Yum!


Refrigerate till its time to dig in! Enjoy greedily with your family, friends, or just all on your own :)

Monday, August 1, 2011

Bread pudding with salted- sugared Pecans

I'm pretty certain that most most of you who are reading this, have often had, a few slices of bread ( or sometimes even half a loaf) going stale in your refrigerator. Na na... nothing to feel embarrassed about, i do too... I usually air-dry stale bread over a few days and make bread-crumbs, my go-to ingredient for instantly adding 'body' to soups and gravies.

But... I was in the mood for something sweet yesterday, and I figured that eggs, milk and bread (pretty standard breakfast ingredients) would make a quick dessert...an unassuming, comforting, no-fuss bread pudding...
For this recipe I used honey as a sweetener since I'm consciously trying to avoid refined sugar in my recent baking endeavours...Also, I created a salty-sweet nutty crust, with pecans, salt and a pinch of brown sugar... tasted absolutely yum!

Ingredients:
- 7-8 slices stale Bread 
- 1/2 cup Raisins
- 1/4 cup Brandy / dark Rum
- 1 cup Milk
- 2 Eggs, beaten
- 1 tsp Vanilla extract
- 1/2 cup Honey
- 1-1/4 cups Pecans
- 1 tsp cold Butter
- 1 tsp Salt
- 1 tsp brown Sugar


Method:
1.) Preheat the oven to 180 deg C. Soak the raisins in the brandy or the rum. Cut the bread slices into 1/2" cubes.Tumble them into a non-stick baking dish.

2.) Whisk the eggs till they're light and frothy. Add the milk, vanilla, honey and a few tablespoons of the brandy from the raisins. Whisk all the liquid ingredients together.

3.) Add the raisins to the bread cubes. Toss with your fingers to mix gently. Pour the egg-milk mix over the bread cubes. Let the bread soak in the mix for about 10 minutes.

4.) Meanwhile, roughly chop the Pecans and transfer to a bowl. Add the cold butter and with your fingers rub the butter onto the pecans. Add the salt and brown sugar to the pecans and using your fingers coat the pecans nicely.

5.) Spread the salted-sugared Pecans over the soaking bread mixture. Bake @ 180 deg C for about 35-40 minutes.

Serve hot/ cold with fresh berries / cream or topping of your choice. I like this better made with brown bread instead of white. Also, if you have trouble finding Pecans, Walnuts will work just as well... Go on... make this NOW! :)


Sunday, July 10, 2011

Eggless Coffee Cake with Baileys & Chocolate frosting & Toasted Almonds

My first Eggless Cake! :) Have been wanting to try eggless-baking, since I have a couple of friends who are pure vegetarians. My research on the same surprised me, since I discovered that the substitute for eggs were a few tablespoons of simple vinegar...nothing fancy! :)
I flavoured the cake with instant coffee, and used brown demerara sugar instead of regular white sugar, for the slightly smokier flavour it has. The frosting is chocolate spiked with Bailey's Irish Cream, my favorite liqueur...with toasted flaked almonds that I patted onto the cake, to make it this cake even more decadent! :)

Btw, a big thank you to Rahul, my dear brother, for getting me the lovely cake platter as a birthday present! :)

PART- I : THE CAKE

Dry Ingredients (for cake):
- 2 cups Cake flour (maida)
- 1/3 cup instant Coffee powder
- 1-1/4 cups Demerara sugar
- 2-1/2 tsp Baking powder
- 1/3 tsp Salt
Wet Ingredients (for cake):
- 1-1/3 cups Water
- 2/3 cups Vegetable oil
- 2-1/2 tsp Vanilla extract
- 2-1/2 tsp Vinegar


Method for Cake:

1.) Preheat the Oven to 190 deg C. Sift the flour,coffee powder, baking powder and salt. Add the sugar and mix gently to distribute evenly.

2.) In a seperate bowl, whisk together the Water, Oil and Vanilla extract. Make a 'well' in the bowl with the dry ingredients. Pour a little of the Water-oil mixture into in and stir gently to mix. Keep adding the liquid mix little by little and mix gently until well combined.
Be careful about not over-mixing or the cake with bulge in the middle as it rises in the oven.

3.) Pour the batter into a prepared 9" round cake tin. To prepare the cake tin, rub the insides with a few drops of oil. Dust with a teaspoon of flour to coat the surface evenly. Alternatively, use a non-stick or teflon-coated cake tin.

4.) Stir in the vinegar into the batter, just before you pop the tin into the oven. Bake at 190 deg C for about 50-55 mins, or till a cake tester comes out clean. Let the cake cool down. Loosen the cake from the tin and remove gently. Place on a wire rack and allow the cake completely before you begin frosting it.


PART- II : THE FROSTING

Ingredients:
1 cup semi-sweet Chocolate chips
1/4 cup unsalted Butter, at room temperature
4-5 tbsp Baileys Irish Cream liquer
1 cup Almond flakes, toasted on a pan or in the oven

Method: 
1.) Heat a large pan with water. Place the chocolate chips in a glass bowl and immerse the hot water. Melt the chocolate chips by stirring gently. Add the Baileys into the melting chocolate. Remove from heat and allow the chocolate to cool a little.

2.) Add the butter into the chocolate. Whip using an electrical beater on medium and then high speed. Continue beating till the mixture thickens slightly. Chill the frosting in the refrigerator for about 10 mins.

3.) Lay the cake onto the serving platter. Line the sides with paper towels to protect the plate from any accidental drips. Slather the frosting onto the cake using a rubber spatula or any other broad-flat spoon.

4.) Cool the cake in the refrigerator while you toast the almond flakes on a non-stick pan or in the oven, till they're golden brown. Sprinkle the almonds all over the cake and 'pat' gently to make sure that they hold onto the frosting.


 Chill the cake in the refrigerator, and remove about 10 mins before you plan to serve it, so that the frosting is firm yet soft....


I  was very pleased with the results of my first eggless cake... and although I love eggs in baked goods, I plan to experiment more for the benefit of my friends who dont :) 


Happy eating! :)

Monday, June 20, 2011

Super-Quick Chocolate Mousse

Making desserts is probably my most favorite activity in the realm of cooking, and even more so when it involves chocolate. The best part about using chocolate, is that it goes beautifully with so many ingredients... coffee, rum, nuts, fruit... and yet, its wholesome and delicious all on its own. The greed-inducing glistening dark chocolate, the smoothness of the cream, and slightly bitter aftertaste of the liqueur, makes this chocolate mousse unadulterated evil :) Gelatin gives the mousse a soft jelly-ish consistency. But since I wanted to get this done VERY quickly, I referred Nigella's chocolate mousse recipe which uses marshmallows. I tweaked the flavors a little and voila! I had 6 glasses of Mousse in a 15 minutes!

Ingredients:
- 150 g plain Marshmallows
- 50 g unsalted Butter (soft)
- 250 g Plain dark chocolate (bar or chips)
- 60 ml hot Water
- 250 ml heavy Cream
- 1 tsp Vanilla Essence
- 30 or 60 ml Baileys Irish Cream liquer
(Or Dark Rum / or / Black coffee) (as per taste)
- 1/4 cup Almond flakes (toasted) to garnish

Method:
1.) Put the marshmallows, butter, chocolate chips in a non-stick saucepan. Heat gently. Pour the hot water over the mixture to help the marshmallows melt. Keep stirring to keep the mixture from scorching.

2.) While the marshmallows melt, whip the heavy cream & vanilla essence in a seperate bowl till its nice and thick. Fold into the marshmallow mixture gently. Add the Baileys Irish cream or rum at this point and mix gently.

3.) Scoop the mousse while its still warm into tall glasses or dessert bowls. Allow it to set in the refrigerator for atleast an hour or two.

4.) Toast the almond flakes on a non-stick pan or in the oven and sprinkle over the chilled mousse right before serving. Yum!

I have also made another version of this using fresh strawberries. I left out the Rum/Coffee and used only the vanilla essence to flavor the chocolate. Also, I allowed the mousse to cool just a little bit (room temp) in the saucepan itself.
I layered the mousse using fresh sliced strawberries. So, a layer of sliced berries, a scoop of mousse...3 or 4 layers, of glistening chocolate and luscious berries...Mmm... fabulous!

Seriously, does it get any easier than this?

Saturday, April 16, 2011

Mini Cupcakes with Lemon-Cream cheese frosting

Our friends Ritesh & Archisha are expecting their first baby in a couple of months. I scratched my head, wondering what to get them on their babyshower...Rattles? toys? baby clothes? gift vouchers?....hmmm... none of these seemed like as much fun to me as an edible babyshower gift! As a result of that I spent a rather enjoyable Sunday afternoon, baking a batch of 24 mini-muffins.
The base for these cupcakes comes from my mom's basic cupcake recipe, and for the frosting I referred Rachel Allens lemon cupcakes (found here).
I wanted to try something that wasn't too sweet, but at the same time most definitely qualified as dessert. So I used cream-cheese for the frosting, flavoured with freshly grated lemon zest and lemon juice.
This recipe will yeild 12 normal sized cupcakes or 36 mini cupcakes. I hope Archie enjoyed eating them as much I enjoyed making them :)

Dry Ingredients for Cupcakes:
1 cup All purpose flour (maida)
1/4 tsp Baking powder

Wet Ingredients for Cupcakes:
2 eggs
3/4 cup soft brown Sugar
3/4 cup Unsalted butter (at room temp)
2 tbsp plain Yoghurt
1 tsp Lemon zest
1 tsp Lemon juice

Kitchen Essentials (for complete recipe):
Convection Oven | 3 Piping bags(or ziplock bags)| Hand -held mixer | Mixing bowls | Rubber spatula | Paper muffin cups | muffin tray

Method (for Cupcakes):
1.) Preheat your oven to 180 deg C. Sift the flour and baking powder into a dry bowl and set aside.
2.) Cream the butter and sugar till light and fluffy. Add the eggs one-at-a-time and beat on medium. Once the eggs are creamed into the mixture, add the Yoghurt, lemon juice and lemon zest and beat on high for a few seconds till well integrated.
3.) Add the flour mixture in 3 steps - i.e. add 1/3rd of the flour, then beat on medium for a few seconds till well mixed. Add the next 1/3rd and beat again. For the last addition of flour, beat on slow for a few seconds. Scrape the batter off the mixer blades.
*At this stage, the mixture might look 'curdled', do not worry about it.*

4.) Fill the batter into a piping bag/ ziplock bag. This I discovered, makes filling the tiny paper cups MUCH easier. To make this transfer from bowl to bag quicker with minimal mess, set the bag into a tall-ish glass with the edges folded over as shown in the image on the left. (this image is borrowed from google, since I forgot to take one myself) Scoop the batter into the bag. Remove bag from the glass and squeeze the batter towards a corner. Secure the bag with a rubber band or tape, after removing as much air as possible from the batter. Snip off the tip with a scissor and your bag is ready to use.


5.) Line the muffin tray with the paper cups and pipe the batter into the cups. Bake @ 180 deg C for about 10-12 mins (baking time is for the mini-cupcakes, for regular sized cupcakes, allow about 15-16 mins) till a toothpick/ knife comes out clean.


 6.) Transfer baked cupcakes on to a wire rack and allow them to cool down completely.Meanwhile, get on with the frosting ! :)


LEMON-CREAM CHEESE FROSTING

Ingredients for Frosting:
50g Cream cheese + 25g Unsalted butter + 75 g Icing sugar + 1 tsp Lemon zest + 1tsp Lemon juice + Food colouring ( I used yellow and grape colours)

Method to make Frosting:
Cream the Butter and Cream cheese together in  a bowl using an electric mixer, till soft and fluffy. Add the icing sugar in stages (or it will fly out of the bowl!) and cream till well mixed.
Add the lemon juice and zest and a dash of food colouring and cream again. Transfer into a piping bag (using the technique described earlier) and Chill for about 20 mins.

Method to Frost the cupcakes:
Since I don't have the appropriate nozzles needed to create a pretty frosting, I proceeded by simply snipping off a small tip from the piping bag. I'm not proud of my artwork (as yet) but am hoping to develop my frosting skills as I go along. But these pictures should come in handy for someone willing to try :)

Pipe the frosting onto the cupcake by creating a spiral as you go along. Sprinkle with coloured edible decorations. Chill for about 20 mins to allow the frosting to set again.


Sunday, April 3, 2011

Vanilla Pound Cake with Home-made Blueberry Sauce

My mom has been making a basic pound cake since I was a kid... The intoxicating aroma of melting butter mixing with sugar, flour and vanilla, and the greed with which my brother Rahul and I would watch her sift, whip and fold the ingredients, knowing she was literally creating magic in that mixing bowl, is the kind of stuff that I remember most distinctly from my childhood... And ofcourse, the best part would be, being allowed to lick the batter off the mixing bowl and spoon and making the most obscene 'yummy' noises. :)
A traditional 'Pound cake' refers to a type of cake made with a pound of each of four ingredients: flour, butter, eggs, and sugar, hence the name...
To make this cake a little more decadent, I made some blue-berry sauce to drizzle over it...and this made the Indian Victory, even sweeter :)

Ingredients:
3 Eggs @ room temperature
3 tbsp Milk @ room temperature
1-1/2 tsp Vanilla extract
185 g Unsalted butter @ room temperature
1-1/2 cups All purpose flour (maida)
3/4 cup Sugar -1/2cup brown+1/4 cup white
1 tsp Baking powder
1/4 tsp Salt

Method: 
Before you begin, preheat the oven to 180 degrees C. Prepare the a 9"x2" cake tin by rubbing the insides with a little butter and dusting with flour.

1. In a mixing bowl, sift the flour and baking powder together. Mix in the salt and set aside.
2. In a seperate bowl, beat the butter, sugar, milk and vanilla extract till soft and fluffy. Add the eggs, one and by and continue to beat slowly till well integrated.
3. Add the dry flour mix into the wet ingredients, and mix until just combined. Increase the speed to 'aerate' the cake.
4. Pour the batter into the prepared cake tin and bake @ 180 deg C for about 55-60 minutes, or till cake tester comes out clean.
5. Allow the cake too cool for 8-10 minutes. Run a clean knife around the edges and loosen the cake from the tin. Allow the cake to cool completely before serving.


HOME MADE BLUEBERRY SAUCE


In a sauce pan, combine:
2 cups Blueberries + 1/3 cup Sugar + 1 tbsp Lemon juice + 1/4 tsp Lemon zest + 1/4 tsp Salt + 1/2 tsp Vanilla extract.

Set the saucepan over a medium flame. As the sugar begins to melt, the berries will begin to pop and cook. Bring the mixture to a boil - about 8-10mins. Stir occasionally to prevent it from boiling over.
Allow the sauce to cool completely. Pour into an airtight bottle, preferably glass and chill for atleast 2-3 hours. The cooling will thicken the consistency of the sauce.

Drizzle generously over cake or ice-cream. Enjoy!


Sunday, December 5, 2010

Layered Chocolate Mousse Birthday Cake!

Birthday's are "just another day" for Vineet. One day you are 'young and dynamic' and the next you're 'older and wiser'.I'm on the other hand, the kind of person who is willing to celebrate pretty much anything, so my dear husbands 30th was'nt exactly something that I was going let slip by without as much as a cake! So this one is dedicated to Vineet and all of our friends, who have turned or are soon turning 'older and (hopefully) wiser' this year! :D Happy birthday!

 So, since the mousse needs a little time to cool down and set before it can be assembled onto the cake, I recommend you begin with that. I started with the cake and ended up wasting a lot of time waiting for the moussed to cool!


PART 01/03 - THE MOUSSE !

Ingredients for the Chocolate Mousse:
1 cup Heavy Cream 
175 g Bittersweet chocolate (chopped - I used bittersweet chocolate chips)
1/4 cup Sugar
3 tbsp Unsweetened Cocoa powder (sifted)
4 tbsp Unsalted butter (at room temperature)
4 large Egg whites
1 tsp Vanilla extract
1/4 tsp Salt

Method:
1.  Pour cream into a large saucepan and set over a medium flame. Add the Cocoa powder and stir, and bring the cream to a full boil. 

2. Remove the pan from heat and immediately add the chocolate chips and butter. Whisk with a fork until melted and smooth. Add the Vanilla extract and salt. 

3. One by one separate the egg whites into a clean and dry (preferably glass) bowl. Whip the egg separated egg whites using a hand held electric beater till they're fluffy yet stiff. Once the egg whites are stiff and form soft peaks, scoop them into the cooling chocolate mixture, little by little and gently fold in using a rubber spatula or a wooden spoon. 
*Avoid over mixing as this will 'deflate' the egg whites, and can mess up the texture and lightness of the mousse.*
If you've never beaten egg whites before, please see: http://www.youtube.com/watch?v=LVcNDhwwFB8
 
4. Set the pan over a bowl of iced water. Alternatively, allow it to cool to room temperature naturally. Pour into a glass/Steel bowl and chill in the refrigerator till it sets.

While the mousse cools, get on with the cake!


PART 02/03 - THE CAKE!
DRY Ingredients for Cake:  
1-1/2 cups Cake flour (maida)
1/3 cup Unsweetened Cocoa powder 
1 cup Sugar
2 tsp Baking powder 
1/4 tsp Baking Soda
1/4 tsp Salt

WET Ingredients for Cake:
1 cup Water 
1/4 cup Vegetable oil 
1 large egg 
2 tsp Vanilla extract

Method:
1a.  Preheat the oven to 180 deg C.

1b.  Lightly grease a 9" x 2" cake tin with a little butter/ oil and dust it with a little maida. Set aside without touching the dusted surface.

2.  Sift together all the dry ingredients (except sugar) in a large mixing bowl. Then add the sugar and whisk until blended.

3. In a glass bowl mix together the Wet ingredients using a fork.

4.  Pour the wet mixture into the dry mixture and gently beat until the dry mix is moistened. Do not overbeat - or the cake will bulge in centre like a 'dome'.

5.  Pour the batter into the prepared cake tin and bake in the preheated oven for about 30-35 mins or till a knife comes out clean. (My oven took about 42 mins).

6. Once done baking, allow the cake to cool slightly (about 20-25 mins). Loosen the sides with a knife and turn it out onto a cooling rack. Allow it to cool completely.

PART 03/03 - ASSEMBLING THE CAKE !
 1.  Once the cake has completely cooled, slice the cake in half horizontally. To ensure that you cut across in neatly and not unevenly, line the edge of the cake with toothpicks, or mark 'dots' using a fork for a line of reference. 

2. Once you have the cake in 2 flat-ish halves, Line your serving plate on the edges with some paper napkins and lay the 1 half of the cake on top.
3.  Bring out the chilled mousse and slather it onto one half. Place the 2nd half on top and apply a very slight pressure with your fingers. The mousse will squish out from the middle. (If you're a pig like me, you will scoop it up with one finger and lick it up.... Don't worry, no one will judge you for being greedy :D)

3.  Use a rubber spatula or a flattish wooden spoon and smear the rest of the mousse over the assembled cake. Allow it to set and chill in the fridge till its time to dig in!

Decorating the cake:
Yes, I love my husband, and would go to the end of the world for him, but at 4 pm on a Saturday afternoon, I just got uncharacteristically lethargic... So I took the easy way out and topped the cake with some fresh berries and really, it dint need anything else!
Since this cake is really moist and soft, it might not be a good idea to stick birthday candles into it , since the mousse will begin to melt with the heat... And anyway, as we get older, there end up being more candles than cake... now WHO needs THAT! :)