As someone who loves a good meal, cooking one, came to me as a natural passion. I belong to a family where meal times consisted of not just food, but also noisy conversation centered around the events of the day and discussing the menu for the next. (ah yes, we are a greedy lot! )

For the most part of my life so far, my contribution in the kitchen was assisting mom and my duties were limited, to chopping veggies and laying the table. Then along came the great Indian wedding, and I was suddenly the queen of my very own kingdom. My curiosity about this magical world, coupled with an enthusiastic sous-chef (my husband, Vineet), led me to take on the challenge of preparing meals on a daily basis, and not succumbing to the convenience of hiring a cook.

This blog is a product of my experiments with food (not all are life threatening :D) for my fellow culinary enthusiasts - especially the newly weds and hungry bachelors and is dedicated to the women who've inspired me in the kitchen;
Aji (s),Ma and Nigella Lawson.

Friday, June 28, 2013

Moroccan Beef Keftas in Tomato-Date Sauce


A couple of weekends ago I was watching this new show on the Food Network called "Jenny Morris Cooks Morocco". Minutes into the show I found myself drooooling over the Beef Kefta Kebabs that she was cooking up, complete with a Tomato-Date Sauce served over a bed of fluffy Couscous... sigh! Food heaven! I'm guessing that the fact that I had skipped lunch that afternoon fueled my imagination and I actually pictured myself weightless and floating through the air toward the TV, much like a Tom & Jerry cartoon!!
But ofcourse, I had to read up on what these gorgeous Kefta's were all about and cook them that very weekend!
Kefta, one of Morocco's most popular streetfoods, are seasoned, spicy meatballs that may be cooked on a grill or also in a pan. I was surprised when I saw that the list of ingredients that went into this dish, aside from the ground meat and tinned tomatoes were very standard pantry staples in my Indian kitchen!
This recipe was so simple and the ingredients so easy to source that it hardly needed any substitution or reinventing from Jenny's original. My only intervention was adjusting (increasing) the amount of powdered spices as I felt the original quantities did little for my Indian taste buds, as well as including chopped mint in the kebabs. In cases like this where there are so many spices going in, I'd encourage you to follow your gut and adjust them to your liking and to use the numbers that I've put down as just a guideline.

Also, I made a big batch of Kebabs (about 30) and froze half to use for later. The sauce on the other hand is quantified for one time use for about 2-3 persons.
Serve these up along with some Couscous  or some steamed brown rice for your next exotic dinner party, or a nice romantic meal for two... and I guarantee you wont care who's looking when you're licking the plates clean! :)

Ingredients - for the Kefta Kebabs: 
(Makes about 30 kebabs)
- 500g ground/minced Beef or Lamb
- 2 medium Onions, finely chopped
- 3-4 cloves of Garlic, crushed
- 1-1/2 tsp ground Fennel seeds (saunf powder)
- 1 tsp Nutmeg powder
- 1 tsp (more if you want it hot!) Red chili powder
- 1 tsp Cumin powder
- 1 tsp Cinnamon powder
- Small bunch coriander or parsley finely chopped
- Small handful of mint leaves, finely chopped (or 1 tsp dried mint will also do)
- Salt & Pepper, as per taste

Ingredients - for Tomato-Date Sauce:

- 2 tbsp Olive oil
- 1 med. Onion, chopped
- 3-4 cloves of Garlic, crushed
- 1 tin chopped Tomatos
- 1 tin whole peeled Tomatoes
- 1 handful seedless Dates
- 2 long Brinjals (aka Eggplants), thinly sliced along the length
- 1 tsp Fennel powder
- 1 tsp Cumin powder
- Salt, pepper & dried red chili flakes, as per taste

Method:
1.)  To make the keftas, combine all the ingredients in a large mixing bowl. Mix well using your hands to ensure even distribution of all the seasonings and shape small scoops of meat into bullet shaped kebabs (see photo above).
If you're making the big batch of 30 like I did, arrange half on a grease proof paper and freeze. Once they harden, you can transfer the kebabs into a ziplock bag and stash them in the freezer.

2.)  Heat some olive oil in a non-stick pan and shallow fry the keftas till they're nice and golden and almost cooked through. Drain on a paper towel and allow them to cool down a little bit.

3.)  Meanwhile, get started on the Sauce. Heat the olive oil in a thick bottomed pan. Add the crushed garlic and the Onions and saute for a couple of mins till they take on a slight golden colour. Add both the tins of tomatoes and the seedless Dates, followed by the Fennel and Cumin powders.

4.)  Lower the heat and allow everything to bubble away for a few minutes while you slice the Brinjals length wise. This admittedly was the most tricky part... so if you are'nt feeling up to the effort, just dice the brinjals into 1 inch cubes and toss it into the sauce. But if you are in the mood, slice them thin enough so you are able to wrap the kebabs in 1 slice.

5.) Once you have all the brinjal "ribbons", wrap a kefta in each and secure if necessary with a small toothpick.

6.)  Gently add the wrapped kefta's to the sauce and simmer for another 6-8 minutes till the keftas are cooked through and piping hot. Season with Salt, pepper and red chili flakes.

Serve over a bed of fluffy couscous or steamed brown rice and garnish with some chopped corainder and mint.


As for the remaining kefta's, my stash came in handy when I had my cousins over for dinner a few days ago. I grilled them up and served them along side some Harissa spiked Greek yoghurt (as a dipping sauce) to make for a delicious appetizer!

Sunday, May 26, 2013

BBQ Party Potato Salad


Poolside BBQ's are a popular choice among folks here in Singapore. The warm sunny weather all-year round, and the fact that our poolside is dotted with family sized BBQ pits, makes impromptu parties a fun, welcome way to spend a Saturday evening.
This modest chilled Potato Salad uses very standard pantry ingredients and comes together in barely 10 mins (not counting the time needed to boil the potatoes of course!). It works as a refreshing, tangy contrast to the smoky flavours of BBQ'd meat and veggies. I'd recommend making this a couple of hours in advance and then covering it and allowing it to chill before serving.
I plan to experiment a little more with this recipe the next time I make it by roasting the potatoes instead of steaming them... but if any of you readers beat me to it, let me know how it turns out! :)


Ingredients: (Serves 4-5 persons)
- 1kg baby potatoes, steamed till tender
- 1 large red Onion, halved and thinly sliced
- 3/4 cup regular or eggless Mayonnaise
- 1/4 cup Dijon mustard
- 2 cloves Garlic, grated
- 1-1/2 tsp Lime juice
- 1-1/2 tsp cracked black Pepper
- 1 tbsp dried Chilli flakes
- 2 tbsp fresh /OR/ 1/2 tbsp dried Mint leaves
- 1 small handful of Coriander, roughly chopped
- Salt, to taste


Method:

1.) Slice the cooled baby potatoes into rounds, not too thin, but thick enough to pick up with a fork.  Set aside. Peel the potatoes if you must before you slice, but I left the skins on.

2.) In a bowl, whisk together the mayo, dijon mustard, grated garlic and lime juice to make the salad dressing. Add the cracked black pepper, chili flakes and mint. Mix well.

3.) Pour the dressing over the potato followed by the sliced red onion and mix gently to coat the potatoes evenly. Do a quick taste- test and season the salad with some salt.

Cover the salad with some plastic wrap and chill in the refrigerator for atleast 30mins. Garnish with a handful of chopped coriander right before you serve. Enjoy! :)


Sunday, April 7, 2013

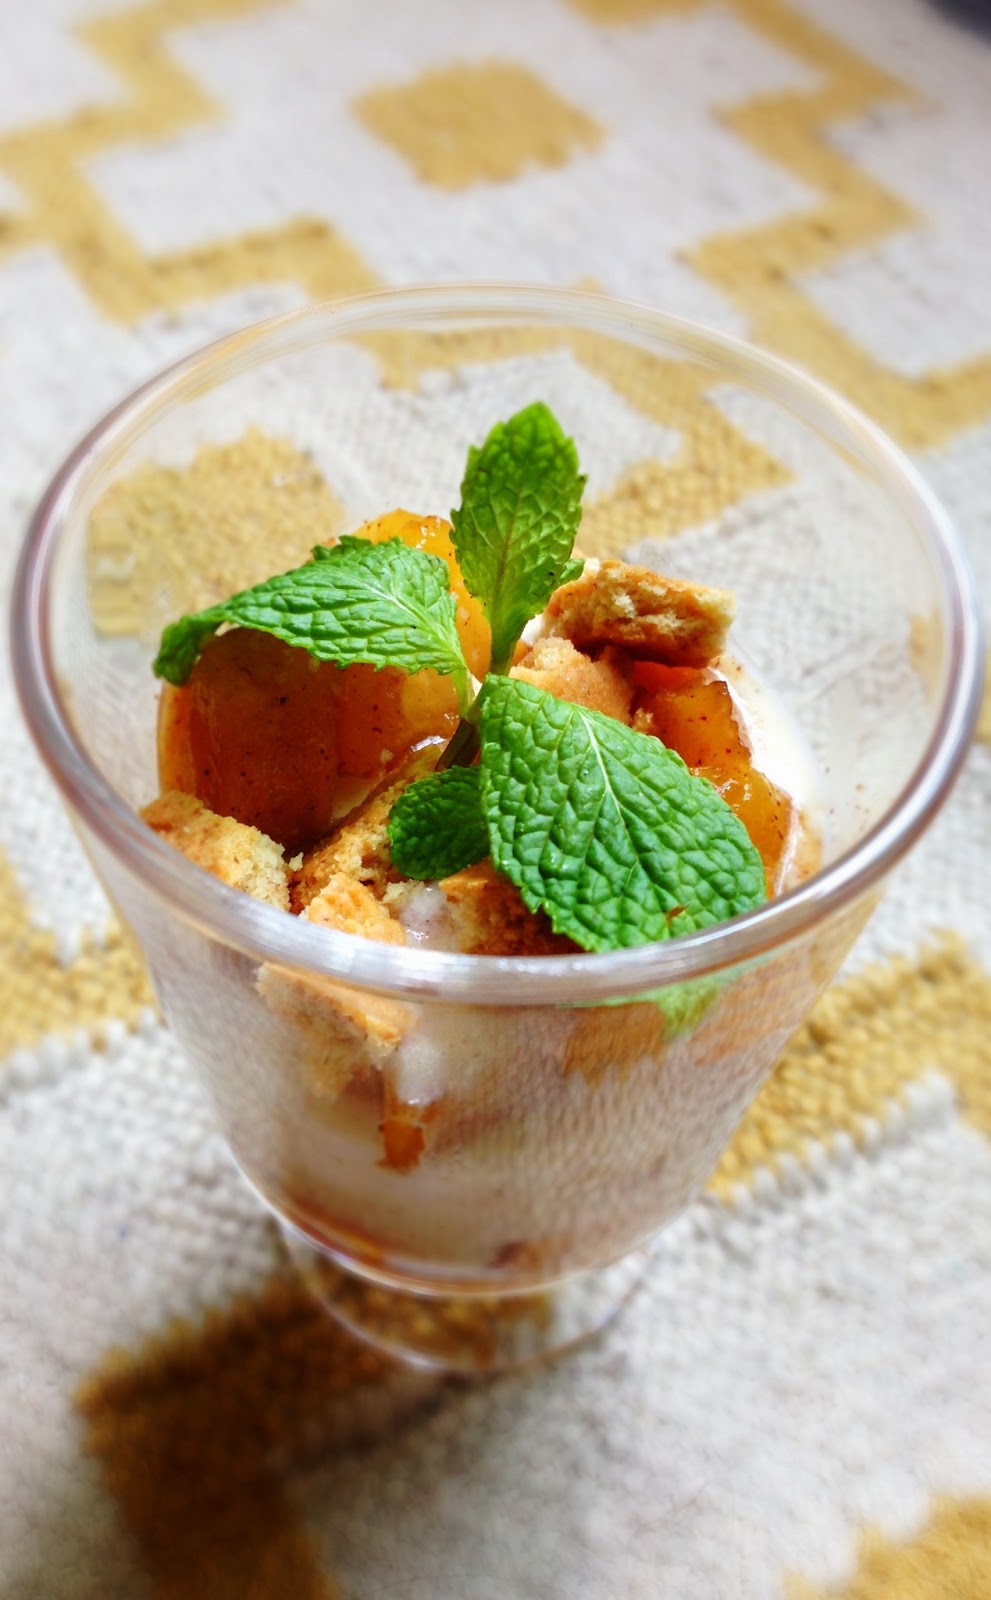
Cinnamon Grilled Peach with Ginger-Brandy Whipped Cream

Dessert unarguably is the high point of any party. It's rare to find someone who doesn't enjoy indulging in a light, sweet treat to conclude a scrumptious meal. Since Keya is now old enough for solids, I excitedly bought a huge box of super yummy and juicy Yellow Peaches for her only to realize, that they'd go all squishy at the rate she would consume them. 
So when we invited our friends Tuhin & Anushree over for Sunday lunch, I decided to use the Peaches to whip up a simple yet decadent dessert. 
My first thought was to make a Peach cobbler. I then recalled an episode from one of Bobby Flay's shows where he grilled peaches marinated in Cinnamon sugar. I also recalled falling head-over-heels in love with the gorgeous grill marks on the fruit when he served them up with mint leaves. The decision was made and out came my stove-top grill pan.
I wanted to dress these up a little more, so I created a whipped cream topping, spiked with Ginger and Brandy. As I went along, I also felt it could also use something extra in terms of the textures one would get in a single bite... so in went some toasted digestive biscuits and ginger snaps. The result, was a delicately sweet, delish dessert that is now one of my proudest creations :)

Ingredients: (Serves 6)
- 6 Peaches, ripe but firm, washed
- 2 tsp Olive oil
- 3-4 tsp super-fine Sugar
- 1 tsp powdered Cinnamon
- 1+1 tsp Ginger powder ( only 1tsp if using Ginger biscuits)
- 2 to 3 tbsp Brandy
- 1 cup double Cream
- 6 to 8 Ginger biscuits OR Digestive biscuits
- Mint leaves, to garnish


You will also need-
- A pastry brush
- 6 clear serving glasses (could use juice glasses) 
- An electric beater or balloon whisk to whip the cream.


Method:

1.) Bring a large pot of water to a rolling boil. Turn down the heat and let the water simmer. Cut an X-mark on the Peach as shown in the photo. Drop the Peaches into the water. Ensure that the fruit is completely submerged in the water. Blanch the Peaches for about 45-50 seconds, till the skin wrinkles and appears to loosen.

Using a slotted spoon gently rescue the Peaches from the hot water and drop them into a bowl of cool water (this stops them from cooking). Drain the peaches and pat dry. Peel the cooled Peaches.


2.) Slice the Peaches in half and remove the stone/ seed. Then cut into thick-ish wedges. Set the wedges onto a plate. Using a pastry brush, coat the slices slightly with the Olive oil. 

3.) Heat the grill pan. Using a pair of tongs, gently arrange the Peach wedges and grill till the peaches take on a golden brown colour and dark brown grill marks. Carefully flip the wedges to form grill marks on the opposite side. Turn off the heat and transfer the grilled peaches to a chopping board and allow them to cool. Dice into smaller cubes. Sprinkle the powdered Cinnamon and gently toss to coat the Peaches evenly. Chill in the refrigerator till its time to use.

4.) In a bowl, whip the double cream along with the super-fine Sugar, 1 tsp Ginger powder and the Brandy. Allow the whipped cream to chill in the refrigerator for a few minutes.

5.) Using your fingers break the Ginger biscuits into chunks. If using Digestive biscuits, break into chunks and sprinkle with the remaining 1 tsp of Ginger powder. Toss to mix.

6.) Arrange the serving glasses. Place a couple of spoonfuls of diced Cinnamon-marinated Peaches in each. Add a dollop of the Ginger-Brandy Whipped cream, followed by the crumbled biscuits. Repeat the layers till desired portion sizes are achieved, allowing the topping layer to be that of diced peach and crumbled biscuit. 

Place the glasses in the refrigerator for atleast an hour or two to chill.

7.) Garnish with fresh mint right before you serve.


Sunday, February 3, 2013

Banana Bread

All of us at some point in time, have had a bunch of bananas lying around the kitchen, going brown. You keep telling yourself, I better finish those, before they go smushy... then, another day goes by...and now they just plain gross... not only are they an unappetizing brown to look at, but they are also simply PERFECT to bake with! Adapted from the original Martha Stewart Banana bread recipe, this cake-like bread, is great as a weekend (or mid week!) breakfast treat, and works great when paired with a steaming cup of tea or coffee.
So, stop feeling bad about letting the bananas go brown, and bake with them instead! :)

Ingredients: (Makes 1, 9"x4" loaf)
Dry mix:
- 1 cup All-Purpose Flour
- 1 tsp Soda Bicarb
- 1/2 tsp Salt
- 1/2 tsp ground Nutmeg
- 1/2 tsp ground Cinnamon

Wet mix:
- 1/2 cup Butter, softened @ room temperature
- 1/2 cup Sugar
- 2 Eggs @ room temp
- 1/4 cup plain Yoghurt+ 1/4 cup Water (buttermilk)
- 1 cup mashed Bananas + 1 tsp Vanilla

Optional additions: Chopped or slivered Almonds & Golden raisins


Method:
1.)  Preheat the oven to 180 deg C. Grease and dust a 9x5" loaf pan. Sift the ingredients of the dry mix together and set aside.

2.)  Cream the butter and sugar in a bowl till light and fluffy. Add the eggs one at a time and beat lightly after each addition.

3.)  Add the mashed Bananas+ Vanilla extract. Add the Buttermilk and dry mix to the bowl, alternating each addition.... i.e. little of the dry mix, followed by some of the buttermilk... repeat.

4.)  Pour the batter into the loaf pan and bake for about 55-60 mins or till a cake tester comes out clean.

5.)  Allow the Banana bread to cool in the pan. Run a butter knife along the edges and loosen. Turn out onto a wire rack and let it cool completely. Best stored in an airtight container in the refrigerator, in case the weather is warm.

Slice up and enjoy with a generous slather of Cream cheese & a cup of coffee! 

Roast Garlic, Broccoli & Pea Soup


Been meaning to upload this recipe for the past couple of days, but something or the other got in the way - but tonight, on the eve of my return to work after 5 months of maternity leave, here I am, finally writing!
Whipped this up with some left over Broccoli for a healthy lunch. Broccoli by itself is rich in Vitamin C and an excellent source of fiber. I love plain steamed Broccoli with just a dash of butter, but felt that the soup needed a little more. So in went the frozen peas, pushing the health quotient of this soup a notch higher. I love the flavour of roasted garlic, as it tastes fabulous and not as garlicky as you would expect, but also the caramalisation while roasting, makes it deliciously sweet, so in went a bulb (yes, a whole bulb!). If you are too lazy to use the oven to roast the garlic, you could try wrapping it in a foil and using a thick bottomed pan to do the trick. But if you do decide to skip the roasting and simply saute the garlic, then I suggest using half the quantity indicated below.
Make this and enjoy with some toasted bread, steamed corn, and you have a light, simple & healthy meal in no time at all!

Ingredients: (Makes about 4 servings)
- 1 medium head of Broccoli, cut into florets
- 1 cup of fresh/ frozen Green Peas
- 1 bulb of Garlic, with peel
- 1 large Onion, sliced thickly
- 1.5 Chicken OR Vegetable stock cube
- 1/2 cup low fat Milk
- 3-4 tbsp Olive Oil,
- Salt & Pepper, to taste
- 1 cup Feta cheese, roughly crumbled


Method:
1.)  Preheat oven to 200 deg C. Place whole bulb of garlic (with peel) and the onion slices on a baking tray lined with aluminum foil. Drizzle with some Olive oil, and season with salt and pepper. Roast for about 12-15 mins on a low rack (not too close to the heating coil), or till the garlic and onion are golden brown.

2.)  Bring a pot of water (lightly salted) to a rolling boil. Reduce to a simmer and cook the Broccoli florets and Peas till soft. Drain the veggies, but retain 2 cups of the water used to boil (you don't want to lose any nutrients!). Dissolve the chicken / vegetable stock cubes in this water. Transfer the stock to a saucepan/ pot in which you want to ultimately cook the entire soup. Save a few of the boiled broccoli florets, to use as a garnish for later.

3.)  Puree the - boiled Broccoli, Peas, Roasted (cooled & peeled) Garlic and Onion - till smooth. Add some of the stock water to thin out the veggies to help the process.

4.) Add the pureed veggie mix in to the saucepan with the stock water. Add the milk and bring to a full boil before turning off. Check seasonings and add salt/ pepper to suit your palette.

5.) Ladle into soup bowls. Garnish with the crumbled Feta cheese and reserved boiled Broccoli florets & Enjoy right away! 

Thursday, December 13, 2012

Roast Pumpkin Soup


Put simply, 2012 has been great... It started off with a bang, with us finding out we were expecting a baby just days before our 3rd wedding anniversary. I surprised myself with how much I was cooking in spite of the fatigue and hormonal see-saw, but by the time I was done plating the food and it was ready to be photographed, I'd have eaten most of it... and when it was time to sit and write, I'd be far far away in dreamland... (allegedly also snoring in contentment, as per my dear husband!)

A whole 11 months later, the baby is down for her afternoon nap, the chores are done and the weather is fantastic - ok the last bit has nothing to do with writing this blog, but it helps to be in a good mood! 
Although I am not really "eating for two" any more, the 9 months of being pregnant made me extremely conscious of what was going into my belly (and on to my butt), and that streak is continuing as I have now graduated into a nursing mom.

I became addicted to Pumpkin soup during the initial months of my pregnancy...something about its mild flavour was comforting and put me in my happy place. Paired with hearty salad this is what I have been turning to quite regularly for weekday lunches when I have to cook for myself while Vineet is away at work ... Its packed with Vitamins A, B, C, E, Calcium and Potassium, and is low in Fat ... Good for me and therefore excellent for little Keya.


Ingredients: (for 2 large servings)
- 2.5 cups Pumpkin, peeled and cubed
- 1 largish Onion, peeled and cut into chunks
- 1 medium Carrot, peeled, cut into cubes
- 2 cloves Garlic (un-peeled)
- 1 or 2 Bacon rashers (Optional)
- 1 Vegetable / Chicken stock cube, crushed
- 1 cup low fat Milk, slightly warmed
- 2-3 tbsp Olive Oil
- 1 tbsp dried Oregano
- Salt & cracked Black Pepper, to taste

Method:
Before you begin, set your oven to pre heat to 220 deg C. Then,
1.) In a mixing bowl, combine the peeled, cubed Pumpkin, Carrot, Onion & unpeeled Garlic cloves. Drizzle with Olive oil and season the veggies with a sprinkling of salt and cracked black pepper & the dried Oregano.

2.) Tumble the seasoned, oiled veggies onto a aluminum foil- lined baking tray and pop it into the oven for about 40-45 minutes or until soft and slightly golden brown around the edges.

3.) Saute the bacon in a non-stick frying pan until its browned but still not crisp. Drain on a paper towel and set aside. 

4.) Allow the roasted veggies to cool down a little. Transfer into a food processor after discarding the peels of the garlic. Add the cooked bacon (if using) and then pour a little luke warm water over the veggies and blitz on "pulse"mode till the softened veggies are mashed, and then puree everything till its creamy and lump-free.

5.) Bring 1/2 a cup of water to a simmer and dissolve the Veg/ Chicken stock cube. Mix in the pureed pumpkin mixture and stir gently to combine. Add the milk and bring the soup up to a full boil. Turn down the heat and allow it to simmer for a couple of minutes. Turn off the heat. Season once again with Salt/ Pepper/ Oregano to your liking. 

6.) Done! 


The soup puree can be made in bulk and refrigerated for 3-4 days or then frozen for atleast a couple of weeks if you want to use it later. 

Green Bean Salad with Olives & Feta


I love green beans but had somehow never eaten them in salad form... Vineet who will eat beans only if they are cooked a certain way, was skeptical about trying this out, so I made myself this salad for lunch yesterday, just to take the recipe out for a spin... and man! o man! 
I'm more than certain Vineet is going to gobble this up on Friday night when I make it for him along side some Buttermilk roast chicken (found here)

Green beans are rich in Vitamins A, C & K, are high in fiber and are also a source of Potassium & Iron. In short, they are extremely good for mom... and dad...and grandma...and grand pa ... well, you get the point. The Olives and Feta bring the unassuming Green beans to life and the Sundried tomato dressing is just soooo good that I promise you will be licking it straight out of the food processor!

As more and more of our friends join us on the ''other side'' and are becoming parents, I plan to develop this new section with recipes for new moms, easy, breezy, healthy and delicious that will ensure that the new parents, especially mothers are well nourished... taking care of a small, precious yet surprisingly loud and shockingly opinionated baby isn't for the faint-hearted after all!

Ingredients: (Serves 2 as an appetizer)
- 2.5 cups Green/ French beans, halved
- 1 medium Onion, sliced
- 1/2 cup pitted Kalamata Olives,halved
- 1/4 cup Feta cheese, roughly crumbled
- 1/2 tsp cracked Black pepper
For Salad dressing:
- 1/4 cup Sundried Tomatoes in Oil, roughly chopped
- 1 large clove Garlic, peeled
- 2 tsp Balsamic Vinegar
- 2 tsp Extra virgin Olive oil (EVOO)


Method:
1.) Bring a pot of salted water to a rolling boil. Cook the beans for just 2 mins and quickly transfer into a bowl with chilled iced water to keep them from over cooking. Drain the beans in a colander and set aside.
2.) To make the salad dressing, place all the ingredients except the EVOO in a food processor and roughly chop. Open the lid, scrape down the sides of the mixer and now add the EVOO and blitz again to form a chunky paste.
3.) Transfer the beans into a salad bowl. Add the sliced Onion and Olives. Add the sundried tomato dressing and toss gently to coat all the veggies. Season the salad with some cracked black pepper and add the crumbled Feta cheese to the party!

Chill in the refrigerator till it is time to eat. This salad will work as a beautiful side- dish to grilled chicken or lamb... mmm... Eat up!