As someone who loves a good meal, cooking one, came to me as a natural passion. I belong to a family where meal times consisted of not just food, but also noisy conversation centered around the events of the day and discussing the menu for the next. (ah yes, we are a greedy lot! )

For the most part of my life so far, my contribution in the kitchen was assisting mom and my duties were limited, to chopping veggies and laying the table. Then along came the great Indian wedding, and I was suddenly the queen of my very own kingdom. My curiosity about this magical world, coupled with an enthusiastic sous-chef (my husband, Vineet), led me to take on the challenge of preparing meals on a daily basis, and not succumbing to the convenience of hiring a cook.

This blog is a product of my experiments with food (not all are life threatening :D) for my fellow culinary enthusiasts - especially the newly weds and hungry bachelors and is dedicated to the women who've inspired me in the kitchen;
Aji (s),Ma and Nigella Lawson.

Sunday, February 3, 2013

Banana Bread

All of us at some point in time, have had a bunch of bananas lying around the kitchen, going brown. You keep telling yourself, I better finish those, before they go smushy... then, another day goes by...and now they just plain gross... not only are they an unappetizing brown to look at, but they are also simply PERFECT to bake with! Adapted from the original Martha Stewart Banana bread recipe, this cake-like bread, is great as a weekend (or mid week!) breakfast treat, and works great when paired with a steaming cup of tea or coffee.
So, stop feeling bad about letting the bananas go brown, and bake with them instead! :)

Ingredients: (Makes 1, 9"x4" loaf)
Dry mix:
- 1 cup All-Purpose Flour
- 1 tsp Soda Bicarb
- 1/2 tsp Salt
- 1/2 tsp ground Nutmeg
- 1/2 tsp ground Cinnamon

Wet mix:
- 1/2 cup Butter, softened @ room temperature
- 1/2 cup Sugar
- 2 Eggs @ room temp
- 1/4 cup plain Yoghurt+ 1/4 cup Water (buttermilk)
- 1 cup mashed Bananas + 1 tsp Vanilla

Optional additions: Chopped or slivered Almonds & Golden raisins


Method:
1.)  Preheat the oven to 180 deg C. Grease and dust a 9x5" loaf pan. Sift the ingredients of the dry mix together and set aside.

2.)  Cream the butter and sugar in a bowl till light and fluffy. Add the eggs one at a time and beat lightly after each addition.

3.)  Add the mashed Bananas+ Vanilla extract. Add the Buttermilk and dry mix to the bowl, alternating each addition.... i.e. little of the dry mix, followed by some of the buttermilk... repeat.

4.)  Pour the batter into the loaf pan and bake for about 55-60 mins or till a cake tester comes out clean.

5.)  Allow the Banana bread to cool in the pan. Run a butter knife along the edges and loosen. Turn out onto a wire rack and let it cool completely. Best stored in an airtight container in the refrigerator, in case the weather is warm.

Slice up and enjoy with a generous slather of Cream cheese & a cup of coffee! 

Roast Garlic, Broccoli & Pea Soup


Been meaning to upload this recipe for the past couple of days, but something or the other got in the way - but tonight, on the eve of my return to work after 5 months of maternity leave, here I am, finally writing!
Whipped this up with some left over Broccoli for a healthy lunch. Broccoli by itself is rich in Vitamin C and an excellent source of fiber. I love plain steamed Broccoli with just a dash of butter, but felt that the soup needed a little more. So in went the frozen peas, pushing the health quotient of this soup a notch higher. I love the flavour of roasted garlic, as it tastes fabulous and not as garlicky as you would expect, but also the caramalisation while roasting, makes it deliciously sweet, so in went a bulb (yes, a whole bulb!). If you are too lazy to use the oven to roast the garlic, you could try wrapping it in a foil and using a thick bottomed pan to do the trick. But if you do decide to skip the roasting and simply saute the garlic, then I suggest using half the quantity indicated below.
Make this and enjoy with some toasted bread, steamed corn, and you have a light, simple & healthy meal in no time at all!

Ingredients: (Makes about 4 servings)
- 1 medium head of Broccoli, cut into florets
- 1 cup of fresh/ frozen Green Peas
- 1 bulb of Garlic, with peel
- 1 large Onion, sliced thickly
- 1.5 Chicken OR Vegetable stock cube
- 1/2 cup low fat Milk
- 3-4 tbsp Olive Oil,
- Salt & Pepper, to taste
- 1 cup Feta cheese, roughly crumbled


Method:
1.)  Preheat oven to 200 deg C. Place whole bulb of garlic (with peel) and the onion slices on a baking tray lined with aluminum foil. Drizzle with some Olive oil, and season with salt and pepper. Roast for about 12-15 mins on a low rack (not too close to the heating coil), or till the garlic and onion are golden brown.

2.)  Bring a pot of water (lightly salted) to a rolling boil. Reduce to a simmer and cook the Broccoli florets and Peas till soft. Drain the veggies, but retain 2 cups of the water used to boil (you don't want to lose any nutrients!). Dissolve the chicken / vegetable stock cubes in this water. Transfer the stock to a saucepan/ pot in which you want to ultimately cook the entire soup. Save a few of the boiled broccoli florets, to use as a garnish for later.

3.)  Puree the - boiled Broccoli, Peas, Roasted (cooled & peeled) Garlic and Onion - till smooth. Add some of the stock water to thin out the veggies to help the process.

4.) Add the pureed veggie mix in to the saucepan with the stock water. Add the milk and bring to a full boil before turning off. Check seasonings and add salt/ pepper to suit your palette.

5.) Ladle into soup bowls. Garnish with the crumbled Feta cheese and reserved boiled Broccoli florets & Enjoy right away! 

Thursday, December 13, 2012

Roast Pumpkin Soup


Put simply, 2012 has been great... It started off with a bang, with us finding out we were expecting a baby just days before our 3rd wedding anniversary. I surprised myself with how much I was cooking in spite of the fatigue and hormonal see-saw, but by the time I was done plating the food and it was ready to be photographed, I'd have eaten most of it... and when it was time to sit and write, I'd be far far away in dreamland... (allegedly also snoring in contentment, as per my dear husband!)

A whole 11 months later, the baby is down for her afternoon nap, the chores are done and the weather is fantastic - ok the last bit has nothing to do with writing this blog, but it helps to be in a good mood! 
Although I am not really "eating for two" any more, the 9 months of being pregnant made me extremely conscious of what was going into my belly (and on to my butt), and that streak is continuing as I have now graduated into a nursing mom.

I became addicted to Pumpkin soup during the initial months of my pregnancy...something about its mild flavour was comforting and put me in my happy place. Paired with hearty salad this is what I have been turning to quite regularly for weekday lunches when I have to cook for myself while Vineet is away at work ... Its packed with Vitamins A, B, C, E, Calcium and Potassium, and is low in Fat ... Good for me and therefore excellent for little Keya.


Ingredients: (for 2 large servings)
- 2.5 cups Pumpkin, peeled and cubed
- 1 largish Onion, peeled and cut into chunks
- 1 medium Carrot, peeled, cut into cubes
- 2 cloves Garlic (un-peeled)
- 1 or 2 Bacon rashers (Optional)
- 1 Vegetable / Chicken stock cube, crushed
- 1 cup low fat Milk, slightly warmed
- 2-3 tbsp Olive Oil
- 1 tbsp dried Oregano
- Salt & cracked Black Pepper, to taste

Method:
Before you begin, set your oven to pre heat to 220 deg C. Then,
1.) In a mixing bowl, combine the peeled, cubed Pumpkin, Carrot, Onion & unpeeled Garlic cloves. Drizzle with Olive oil and season the veggies with a sprinkling of salt and cracked black pepper & the dried Oregano.

2.) Tumble the seasoned, oiled veggies onto a aluminum foil- lined baking tray and pop it into the oven for about 40-45 minutes or until soft and slightly golden brown around the edges.

3.) Saute the bacon in a non-stick frying pan until its browned but still not crisp. Drain on a paper towel and set aside. 

4.) Allow the roasted veggies to cool down a little. Transfer into a food processor after discarding the peels of the garlic. Add the cooked bacon (if using) and then pour a little luke warm water over the veggies and blitz on "pulse"mode till the softened veggies are mashed, and then puree everything till its creamy and lump-free.

5.) Bring 1/2 a cup of water to a simmer and dissolve the Veg/ Chicken stock cube. Mix in the pureed pumpkin mixture and stir gently to combine. Add the milk and bring the soup up to a full boil. Turn down the heat and allow it to simmer for a couple of minutes. Turn off the heat. Season once again with Salt/ Pepper/ Oregano to your liking. 

6.) Done! 


The soup puree can be made in bulk and refrigerated for 3-4 days or then frozen for atleast a couple of weeks if you want to use it later. 

Green Bean Salad with Olives & Feta


I love green beans but had somehow never eaten them in salad form... Vineet who will eat beans only if they are cooked a certain way, was skeptical about trying this out, so I made myself this salad for lunch yesterday, just to take the recipe out for a spin... and man! o man! 
I'm more than certain Vineet is going to gobble this up on Friday night when I make it for him along side some Buttermilk roast chicken (found here)

Green beans are rich in Vitamins A, C & K, are high in fiber and are also a source of Potassium & Iron. In short, they are extremely good for mom... and dad...and grandma...and grand pa ... well, you get the point. The Olives and Feta bring the unassuming Green beans to life and the Sundried tomato dressing is just soooo good that I promise you will be licking it straight out of the food processor!

As more and more of our friends join us on the ''other side'' and are becoming parents, I plan to develop this new section with recipes for new moms, easy, breezy, healthy and delicious that will ensure that the new parents, especially mothers are well nourished... taking care of a small, precious yet surprisingly loud and shockingly opinionated baby isn't for the faint-hearted after all!

Ingredients: (Serves 2 as an appetizer)
- 2.5 cups Green/ French beans, halved
- 1 medium Onion, sliced
- 1/2 cup pitted Kalamata Olives,halved
- 1/4 cup Feta cheese, roughly crumbled
- 1/2 tsp cracked Black pepper
For Salad dressing:
- 1/4 cup Sundried Tomatoes in Oil, roughly chopped
- 1 large clove Garlic, peeled
- 2 tsp Balsamic Vinegar
- 2 tsp Extra virgin Olive oil (EVOO)


Method:
1.) Bring a pot of salted water to a rolling boil. Cook the beans for just 2 mins and quickly transfer into a bowl with chilled iced water to keep them from over cooking. Drain the beans in a colander and set aside.
2.) To make the salad dressing, place all the ingredients except the EVOO in a food processor and roughly chop. Open the lid, scrape down the sides of the mixer and now add the EVOO and blitz again to form a chunky paste.
3.) Transfer the beans into a salad bowl. Add the sliced Onion and Olives. Add the sundried tomato dressing and toss gently to coat all the veggies. Season the salad with some cracked black pepper and add the crumbled Feta cheese to the party!

Chill in the refrigerator till it is time to eat. This salad will work as a beautiful side- dish to grilled chicken or lamb... mmm... Eat up!

Sunday, January 8, 2012

Chettinad Mutton & Dosa

Mahrooh, or MoneyPenny as I like to call her, a good pal from of mine from India, moved to Singapore earlier this week for her Post- grad education. She spent her first weekend in Singapore with us, and we had a super fun time doing what we know best... giggle, eat, laugh, repeat :)
I wanted to treat her to something special before she moved to campus, where she will have to deal with her recently discovered 'favourite' .... fishball noodles :) lol

This Chettinad mutton is pressure cooked, and therefore relatively quick (and energy efficient) to make .Chettinad cuisine is among the most popular South Indian preparations since it is intensely aromatic, and spicy owing to the whole spices that go into it along with my personal favourite... curry leaves (kadipatta). It is Super delicious when served with freshly made crispy Dosas or steamed rice.... Bon appetit!

Ingredients:
- 600 g boneless Mutton, cut into curry sized pieces
- 2-3 tbsp Oil (Olive or refined vegetable)
- Whole spices:
2 sticks Cinnamon + 3 Star Anise + 1 tsp black Peppercorns +
4-5 Cloves + 3 pods green Cardamom + 1 pod Black Cardamom +
1-1/2 tsp Fennel seeds + 1-1/2 tsp Cumin seeds + 3 Bay leaves

- 2 medium Onions, thinly sliced
- 1-1/2 tbsp Ginger-Garlic paste (preferably fresh)
- 3 medium Tomatoes, 2 pureed and 1 grated
- 15-20 Curry leaves
- 2 tbsp Cumin powder
- 2 tbsp Coriander powder
- 1 tsp Turmeric powder
- 1-1/2 tsp Red Chilli powder
- 2 tsp freshly cracked Black peppercorns
- Salt, to taste
- Coriander leaves, to garnish

Method:
1.) Heat the oil in a pressure cooker. Saute all of the whole spices till they sizzle and are fragrant. Add the sliced onions and saute till nicely browned. Add the ginger-garlic paste and saute for a few more minutes.

2.) Add the grated tomato along with half of the curry leaves. Add the washed, cleaned Mutton pieces. Stir till the pieces begin to form. Add Turmeric powder, Chilli powder followed by Coriander & Cumin powders.

3.) Add the remaining Tomato puree, freshly cracked black pepper and Salt. Add another 2 cups of water. And pressure cook the curry for 7-8 whistles till the mutton is tender. Switch off heat.

4.) Allow the pressure to drop. Open the lid of the cooker and boil the curry till it reduces and thickens to your desired consistency. Garnish with coriander and serve immediately.


Monday, January 2, 2012

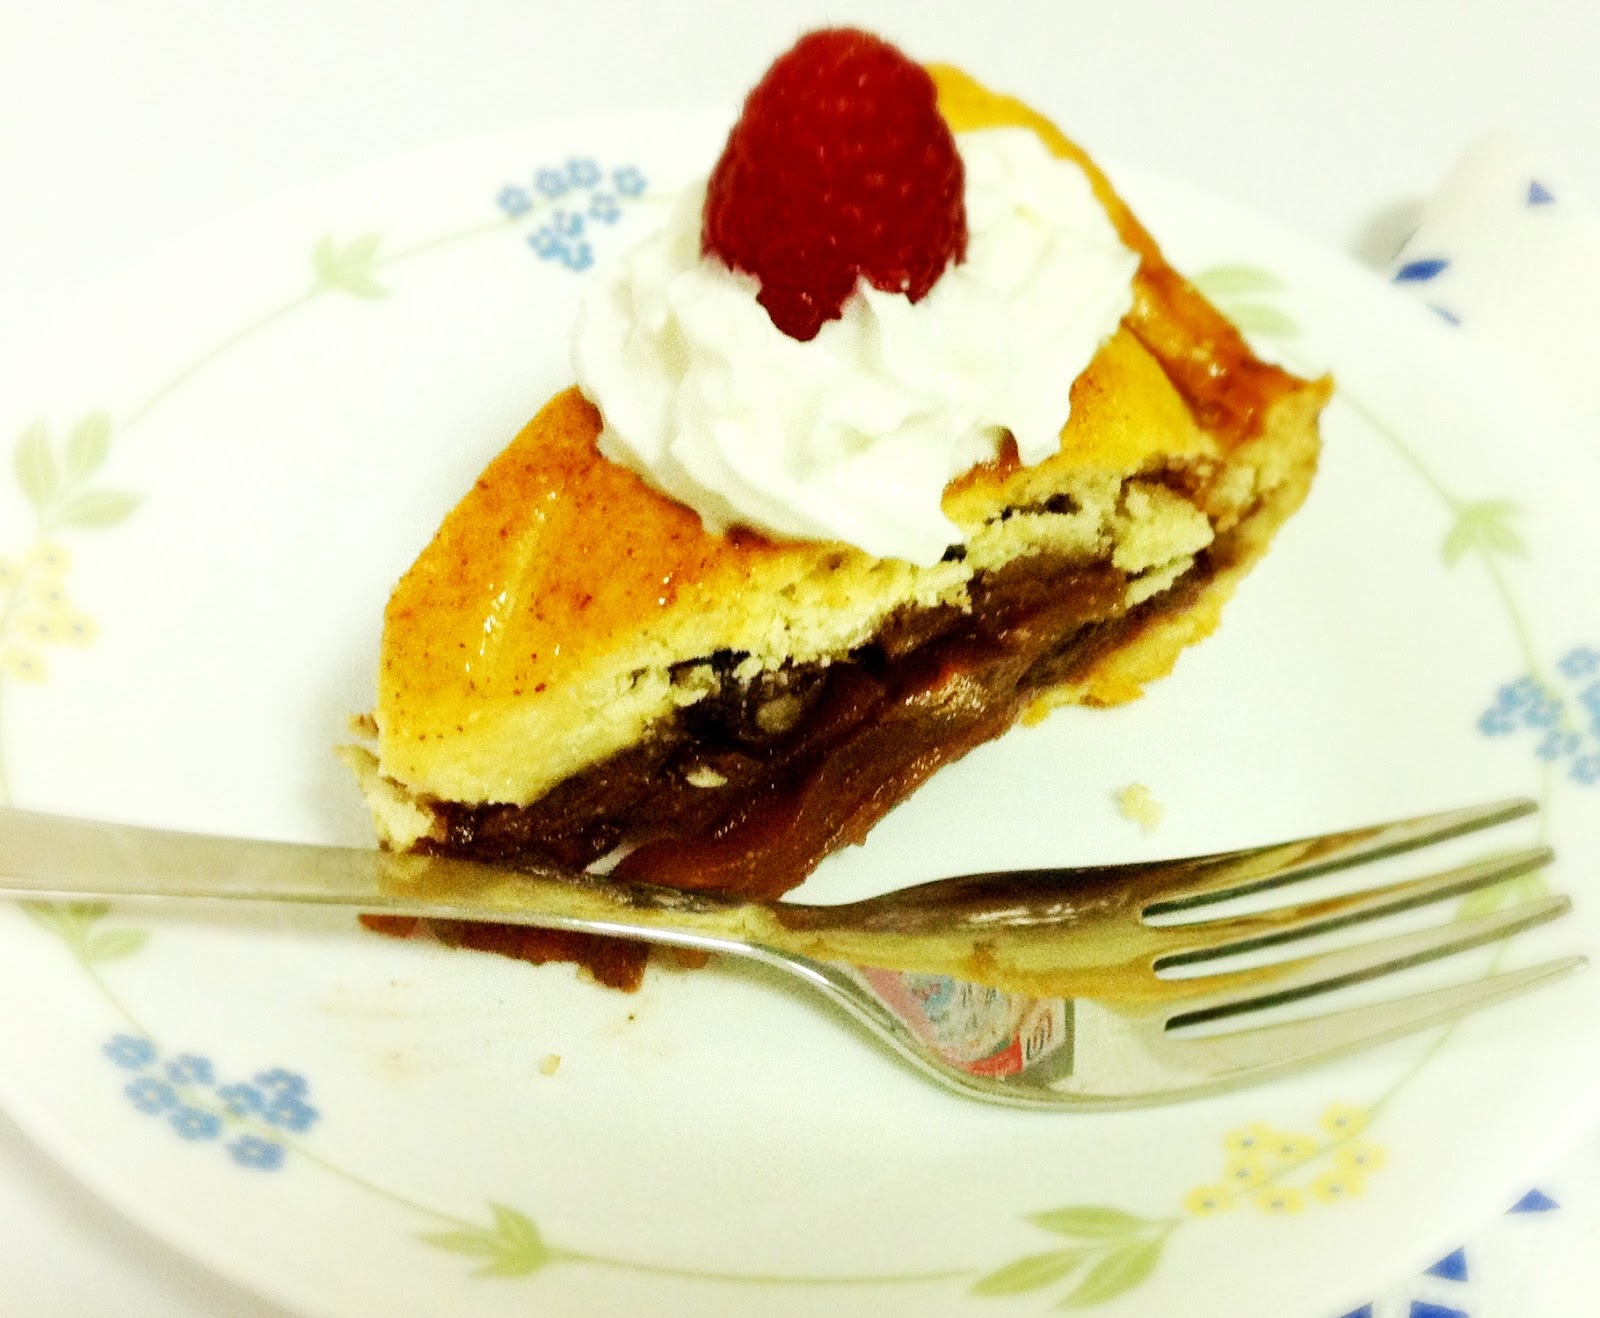
Wicked Apple-Cherry-Whiskey Pie with whipped cream & Berries


 While the last year decided to zip by all of us in the blink of an eye, 2012 made a quiet yet fun entry into our lives. Much like last year, I was in the mood to try out some exciting food to treat ourselves to as we celebrated the last evening of 2011 with friends over drinks, great food and all night poker...
For the past few months now, I've been wanting to bake a pie from scratch... crust and filling. So when I came across beautifully crisp Granny Smiths (what green apples call themselves when they want to be fanciful) I knew it had to be an Apple Pie. I used a very simple, very basic pie crust recipe, which came from reading a LOT of pie recipes with a deliciously wicked sweet-sour-cinnamon-y filling with a serious whiskey kick... I cannot insist enough, that you go try this one this coming weekend !


Ingredients: For Crust
- 2 cups All-purpose flour
- 3/4 cup powdered Sugar
- 1-1/2 tsp Baking powder
- 1/2 tsp Salt
- 3/4 cup chilled unsalted Butter
- 1/4 cup iced Water + more

Ingredients: For Filling
- 6 medium sized Granny Smith apples
- 1 cup dried Cherries (pitted)
- 1/2 cup Scotch whiskey
- 1/2 cup golden brown sugar
- 2 heaped tsp, ground cinnamon
- 1/2 Lime

Whipped cream & blueberries & raspberries to serve.

Special Equipment:
- Food processor / Mixer
- 1 x 9" Glass / Teflon coated / Aluminum foil Pie dish
- Aluminum foil , to protect edges of the pie while baking
- Plastic wrap


Method: For Crust
1.) Place the first four ingredients in the food processor and pulse 3-4 times till well combined. Add the butter and pulse again till a coarse bread-crumb like texture. Start adding the iced/ chilled water little-by-little till moist clumps are formed. Add a couple of more teaspoons of the water till a dough is formed.
2.) Turn out the slightly sticky dough onto a floured surface. Dust your hands with some plain flour and knead the dough into a smooth ball. Dont over-knead, or the heat from your hands will begin to soften the butter. Divide the dough in half. Wrap in plastic wrap and flatten between your palms into a disk. Chill in the refrigerator for about 40-50 minutes.

Method: For Filling
1.) While the dough chills, marinate the dried cherries in the Scotch. Set aside for about 30 mins.
2.) Peel and core the apples. Cut in half and make thin slices. Squirt some lime juice over them to keep them from oxidizing. Stir in the golden-brown sugar and ground cinnamon.
3.) Stir in the marinated cherries along with the whiskey . Toss the apples and cherries together.

To assemble pie:

1.) Roll out one of the chilled dough disks on a lightly floured surface till its about 13" in diameter.... should be large enough to fill the pie dish base and sides with about 1/2" extra all around to help "crimp" the crust.


2.) Gently lift the rolled out dough and lay into the pie dish. Press down super gently with your fingers to make sure that the crust is even.

At this point, preheat your oven to 190 deg C (375 deg F).


3.) Arrange the sliced apples in a spiral fashion and distribute the cherries evenly through out the filling. Retain the whiskey-cinnamon juice - I used this to make the glaze.

For glaze, heat these remaining juices in a saucepan. Let it bubble away till it begins to get sticky and thicken. Switch off heat and let it cool slightly.


4.) Pull out the second dough disk. Roll out to make the top crust. Dust hands lightly with flour. Pick up the rolled out dough gently and lay it over the filled pie. Using your fingers pinch the edges of the pie to seal in the filling.

Using a sharp knife, make small cuts all over the pie shell. These will help the steam from the fruit escape, and prevent a apple explosion in your kitchen ;) 

5.) Brush the cooled glaze all over the pie - EXCEPT on the crust.

6.) Bake at 190 deg C for about 10 minutes. Remove from oven and cover the edges of the pie with aluminium foil. Pop the pie back in the oven and bake for another 50 minutes, till apples are tender and crust is golden.

7.) Allow the pie to cool till warm / or room temperature - whichever you prefer.

I like it slightly warm because I love the contrast of the warm pie against the cool whipped cream and berries.


Eat up greedily, licking off every crumb off the plate.... (probably don't need to tell you that! )

Sunday, November 27, 2011

Sukha Chicken - A Vineet Special !


Yes! I know... it's been forever since I posted anything ( 5 weeks to be precise!)... but in my defence.... my maid disappeared overnight!
She was there one day... helping clean the house, chop the veggies and take care of inhuman piles of ironing... and gone the next! 
Little do most people truly understand the role a good maid plays in the life of a woman.... and if you're Indian, married and have grown to depend on the one person who is actually more useful than your husband around the house on weekends ... you're world gets literally turned upside down when they're gone....

So anyway, now that things have finally gotten under control... Vineet cooks and I clean... (hehe... )... on the weekends that is. His stints in the kitchen are becoming more successful with every passing weekend, and one of Vineets recent master pieces... and believe me I'm not exaggerating when I say 'master piece'.... has been an out-out desi chicken... marinated in spiced yoghurt and stir fried with sliced onions, curry leaves and green chillies... alongside some steamed rice and dal.... its pure perfection! :)


Ingredients: For marinade (For 2 delicious portions)
- 300 g Boneless Chicken breasts
- 3-4 tbsp plain Yoghurt
- 1-1/2 tsp Ginger-garlic paste (fresh!!)
- 1 tsp Red chili powder
- 1/2 tsp Turmeric powder
- 1/2 tsp freshly cracked Black pepper
- 1 tsp Garam masala
- 1 tsp Coriander powder
- Salt, to taste

For the stir fry:
- 2 tbsp Olive (or vegetable) Oil
- 1 large onion, finely sliced
- 1 tsp Cumin seeds
- 1 dried Red chili
- 1 green chili, slit
- 5-6 Curry leaves
- 1 small bunch Coriander, chopped
- Lime wedges

Method:
1.) Wash and pat dry the chicken breasts. Cut into bite sized pieces and place in a bowl.

2.) Whisk the yoghurt  along with the rest of the marinade ingredients. Pour over the chicken. This marinade is very thick, so dont worry if it seems sticky-ish when mixed with the chicken. Cover and set aside for atleast an hour... two hours is ideal.

3.) Heat the oil in a non-stick pan. Add the cumin seeds, dried red chili and curry leaves. Stir fry for a few seconds. Add the marinated chicken pieces. Stir to mix and cover till almost cooked - about 12-15 minutes.

4.) Uncover the pan and add the sliced onions and slit green chili. Stir fry with the chicken for a minute or two till the onions are cooked through.

5.) Garnish with the chopped coriander and squirt a wedge of lime. Serve immediately along with some plain steamed rice and dal, or with roti's and raita. Yum! :)