As someone who loves a good meal, cooking one, came to me as a natural passion. I belong to a family where meal times consisted of not just food, but also noisy conversation centered around the events of the day and discussing the menu for the next. (ah yes, we are a greedy lot! )

For the most part of my life so far, my contribution in the kitchen was assisting mom and my duties were limited, to chopping veggies and laying the table. Then along came the great Indian wedding, and I was suddenly the queen of my very own kingdom. My curiosity about this magical world, coupled with an enthusiastic sous-chef (my husband, Vineet), led me to take on the challenge of preparing meals on a daily basis, and not succumbing to the convenience of hiring a cook.

This blog is a product of my experiments with food (not all are life threatening :D) for my fellow culinary enthusiasts - especially the newly weds and hungry bachelors and is dedicated to the women who've inspired me in the kitchen;
Aji (s),Ma and Nigella Lawson.

Showing posts with label Weekly-food-explorations. Show all posts

Friday, June 28, 2013

Moroccan Beef Keftas in Tomato-Date Sauce


A couple of weekends ago I was watching this new show on the Food Network called "Jenny Morris Cooks Morocco". Minutes into the show I found myself drooooling over the Beef Kefta Kebabs that she was cooking up, complete with a Tomato-Date Sauce served over a bed of fluffy Couscous... sigh! Food heaven! I'm guessing that the fact that I had skipped lunch that afternoon fueled my imagination and I actually pictured myself weightless and floating through the air toward the TV, much like a Tom & Jerry cartoon!!
But ofcourse, I had to read up on what these gorgeous Kefta's were all about and cook them that very weekend!
Kefta, one of Morocco's most popular streetfoods, are seasoned, spicy meatballs that may be cooked on a grill or also in a pan. I was surprised when I saw that the list of ingredients that went into this dish, aside from the ground meat and tinned tomatoes were very standard pantry staples in my Indian kitchen!
This recipe was so simple and the ingredients so easy to source that it hardly needed any substitution or reinventing from Jenny's original. My only intervention was adjusting (increasing) the amount of powdered spices as I felt the original quantities did little for my Indian taste buds, as well as including chopped mint in the kebabs. In cases like this where there are so many spices going in, I'd encourage you to follow your gut and adjust them to your liking and to use the numbers that I've put down as just a guideline.

Also, I made a big batch of Kebabs (about 30) and froze half to use for later. The sauce on the other hand is quantified for one time use for about 2-3 persons.
Serve these up along with some Couscous  or some steamed brown rice for your next exotic dinner party, or a nice romantic meal for two... and I guarantee you wont care who's looking when you're licking the plates clean! :)

Ingredients - for the Kefta Kebabs: 
(Makes about 30 kebabs)
- 500g ground/minced Beef or Lamb
- 2 medium Onions, finely chopped
- 3-4 cloves of Garlic, crushed
- 1-1/2 tsp ground Fennel seeds (saunf powder)
- 1 tsp Nutmeg powder
- 1 tsp (more if you want it hot!) Red chili powder
- 1 tsp Cumin powder
- 1 tsp Cinnamon powder
- Small bunch coriander or parsley finely chopped
- Small handful of mint leaves, finely chopped (or 1 tsp dried mint will also do)
- Salt & Pepper, as per taste

Ingredients - for Tomato-Date Sauce:

- 2 tbsp Olive oil
- 1 med. Onion, chopped
- 3-4 cloves of Garlic, crushed
- 1 tin chopped Tomatos
- 1 tin whole peeled Tomatoes
- 1 handful seedless Dates
- 2 long Brinjals (aka Eggplants), thinly sliced along the length
- 1 tsp Fennel powder
- 1 tsp Cumin powder
- Salt, pepper & dried red chili flakes, as per taste

Method:
1.)  To make the keftas, combine all the ingredients in a large mixing bowl. Mix well using your hands to ensure even distribution of all the seasonings and shape small scoops of meat into bullet shaped kebabs (see photo above).
If you're making the big batch of 30 like I did, arrange half on a grease proof paper and freeze. Once they harden, you can transfer the kebabs into a ziplock bag and stash them in the freezer.

2.)  Heat some olive oil in a non-stick pan and shallow fry the keftas till they're nice and golden and almost cooked through. Drain on a paper towel and allow them to cool down a little bit.

3.)  Meanwhile, get started on the Sauce. Heat the olive oil in a thick bottomed pan. Add the crushed garlic and the Onions and saute for a couple of mins till they take on a slight golden colour. Add both the tins of tomatoes and the seedless Dates, followed by the Fennel and Cumin powders.

4.)  Lower the heat and allow everything to bubble away for a few minutes while you slice the Brinjals length wise. This admittedly was the most tricky part... so if you are'nt feeling up to the effort, just dice the brinjals into 1 inch cubes and toss it into the sauce. But if you are in the mood, slice them thin enough so you are able to wrap the kebabs in 1 slice.

5.) Once you have all the brinjal "ribbons", wrap a kefta in each and secure if necessary with a small toothpick.

6.)  Gently add the wrapped kefta's to the sauce and simmer for another 6-8 minutes till the keftas are cooked through and piping hot. Season with Salt, pepper and red chili flakes.

Serve over a bed of fluffy couscous or steamed brown rice and garnish with some chopped corainder and mint.

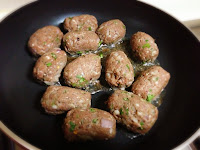

As for the remaining kefta's, my stash came in handy when I had my cousins over for dinner a few days ago. I grilled them up and served them along side some Harissa spiked Greek yoghurt (as a dipping sauce) to make for a delicious appetizer!

Sunday, January 8, 2012

Chettinad Mutton & Dosa

Mahrooh, or MoneyPenny as I like to call her, a good pal from of mine from India, moved to Singapore earlier this week for her Post- grad education. She spent her first weekend in Singapore with us, and we had a super fun time doing what we know best... giggle, eat, laugh, repeat :)
I wanted to treat her to something special before she moved to campus, where she will have to deal with her recently discovered 'favourite' .... fishball noodles :) lol

This Chettinad mutton is pressure cooked, and therefore relatively quick (and energy efficient) to make .Chettinad cuisine is among the most popular South Indian preparations since it is intensely aromatic, and spicy owing to the whole spices that go into it along with my personal favourite... curry leaves (kadipatta). It is Super delicious when served with freshly made crispy Dosas or steamed rice.... Bon appetit!

Ingredients:
- 600 g boneless Mutton, cut into curry sized pieces
- 2-3 tbsp Oil (Olive or refined vegetable)
- Whole spices:
2 sticks Cinnamon + 3 Star Anise + 1 tsp black Peppercorns +
4-5 Cloves + 3 pods green Cardamom + 1 pod Black Cardamom +
1-1/2 tsp Fennel seeds + 1-1/2 tsp Cumin seeds + 3 Bay leaves

- 2 medium Onions, thinly sliced
- 1-1/2 tbsp Ginger-Garlic paste (preferably fresh)
- 3 medium Tomatoes, 2 pureed and 1 grated
- 15-20 Curry leaves
- 2 tbsp Cumin powder
- 2 tbsp Coriander powder
- 1 tsp Turmeric powder
- 1-1/2 tsp Red Chilli powder
- 2 tsp freshly cracked Black peppercorns
- Salt, to taste
- Coriander leaves, to garnish

Method:
1.) Heat the oil in a pressure cooker. Saute all of the whole spices till they sizzle and are fragrant. Add the sliced onions and saute till nicely browned. Add the ginger-garlic paste and saute for a few more minutes.

2.) Add the grated tomato along with half of the curry leaves. Add the washed, cleaned Mutton pieces. Stir till the pieces begin to form. Add Turmeric powder, Chilli powder followed by Coriander & Cumin powders.

3.) Add the remaining Tomato puree, freshly cracked black pepper and Salt. Add another 2 cups of water. And pressure cook the curry for 7-8 whistles till the mutton is tender. Switch off heat.

4.) Allow the pressure to drop. Open the lid of the cooker and boil the curry till it reduces and thickens to your desired consistency. Garnish with coriander and serve immediately.


Monday, October 24, 2011

KP's Asian style Baked Salmon with Mushroom fried Rice

This post marks the official inauguration of the new VIP recipe section that I'm introducing to my blog!
Krithika, or KP as she is known to friends, is like me, a major food and cooking enthusiast.
It was about 7 years ago... in a dingy hostel corridor that we got to know each other, and bonded over our mutual love for watermelon, mango and fish... As days, weeks, months went by we explored and discovered some gems of street food in Pune... I'm sure "our" anda-bhurji man still misses his most loyal fans.... (sigh!) Good times!

So, recently KP made a baked Salmon preparation, that involved marinating the salmon in some Ginger, Soya sauce & Vinegar and baking it. Served alongside a flavorful fried rice made with Mushrooms and Red Capsicum, this light and preparation is easy to put together and perfect for those of you who appreciate delicate Asian flavours.

Ingredients for Marinade:

- 2 tsp finely grated Ginger
- 5-6 tbsp Soya sauce
- 1 tsp Sugar
- 3-4 tbsp Rice wine Vinegar
- 3-4 tsp Sesame oil
- 2 boneless Salmon fillets, 150 g each
- 2 tsp Sesame seeds, lightly toasted on a pan

Whisk all the ingredients of the marinade together. Pour onto the Salmon fillets. Rub the marinade all over the fish using your fingers. Set aside to marinate for the atleast 2 hours.
Preheat your oven to 180 deg C. Line a baking tray with aluminum foil. Pat the marinade onto the fish and gently lay onto the baking tray. Reserve the marinade to use in the rice.
Bake the Salmon for about 12-15 minutes till cooked and slightly browned. Sprinkle the fish with the toasted Sesame seeds. Serve immediately!

Ingredients for Fried rice:
- 2 cups pre-cooked long- grain Rice, refrigerated ( I used good ol' Basmati)
- 1 cup finely chopped Mushrooms
- 1 cup finely chopped Red Capsicum
- 1 medium bunch Spring onions, finely chopped
- 2 tsp Vegetable oil
- 1 egg


Method to make the Fried rice:
Heat the oil in a thick bottomed pan.
Saute the chopped spring onions and capsicum. Add the mushrooms and saute.
Add the reserved marinade from the Salmon. Crack the egg into the pan and swirl it around quickly. Using a wooden spoon, scramble the egg before it sets. Add the cooked refrigerated rice and toss.
Taste to check for salt and splash a few drops of Soya sauce if necessary.

Garnish with a sprig of Coriander. Serve immediately with the baked Salmon.
Eat up!


Sunday, October 2, 2011

Home-made Whole-Wheat, Thin crust Veggie Pizza with Roast-Garlic & Onion Sauce

Vineet and I were in a mood to celebrate my blogs first birthday. Pimm's & Lemonade was on the menu, but we were wondering what one-dish meal it could be paired with, that would allow us to enjoy some much needed downtime at the end of a long week.

It's been a while since I had done any Bread-related baking, and I have been itching to make thin-crust Pizza at home, since there are few places (all very expensive) that make this just like I like it.... crisp crust, smokey flavours and not drowning in a pool of melted cheese... So the decision was made...

Home made Pizza sure might sound like a lot of work... But if I told you, that my active time in the Kitchen was about 40 mins TOTAL - which included making the pizza base and sauce - you will probably find that hard to believe.

Before I get on with the actual recipe... the total time for this pizza is about 2-1/2 hours... of which 1 hour 20 mins is spent watching TV or playing Poker... I promise :) Here's how;


Ingredients | Pizza Base:
- 1/2 cup Whole Wheat flour (atta)
- 1/3 cup All-purpose flour (maida)
- 1/4 tsp Salt
- 1/3 cup + 2 tbsp Warm water (not hot!)
- 1/4 tsp white Sugar
- 1 tsp Active Dried Yeast
- 1 tsp Olive Oil
   
Ingredients | Pizza Sauce:
- 5-6 large large cloves, Garlic (with peel)
- 2 medium Onions, cut in half and thickly sliced
- 2 tsp extra-virgin Olive oil
- 1/2 cup Sundried Tomatoes in oil
- Salt, if needed, as per taste

Ingredients | Pizza Toppings:
- 1 medium Red Capsicum, sliced
- 1 medium Yellow Capsicum, sliced
- 1 cup pitted Kalamata Olives, sliced into rounds
- 10-12 Basil leaves, chopped
- 1 cup Mozzarella cheese, grated
- 1/2 cup Feta Cheese, crumbled

STEP-BY-STEP INSTRUCTIONS TO MAKE THE PIZZA

1.) Measure out the Flours in a clean dry Glass bowl/ non-metallic bowl. Stir in the Salt and set aside...(Yeast reacts badly with metal surfaces...so, no metal spoons for measuring either!)

2.) Dissolve the sugar in the warm water. Add the yeast into the water and set aside for 10 minutes. At the end of 10 mins, the yeast will have expanded and look frothy... at this point. Add the olive oil into the yeasted water. *PREHEAT OVEN TO 180 deg C at this point*. ( BTW.. If the water is too hot it will 'kill' the yeast.. so make sure its temperature is something you can easily dip a finger into)


3.) Make a well in the flour, and slowly pour the yeast-water-oil mixture into it. Start mixing gently using your hands. The dough begins to pull-away from the sides of the bowl. Transfer to a lightly floured, non-metallic surface and knead for about 8-10 mins till a soft pliable dough forms.


4.) Place the kneaded dough back in the bowl and cover with a clean cotton cloth. Set aside in a warm place for the next 45 mins. Get on with the prep for the Sauce.

5.) Chop off the ends of the garlic, leave on the peels. Arrange the garlic cloves and sliced onions on a baking sheet. Drizzle with the olive oil. Put baking sheet in the pre-heated Oven, and bake for 45 minutes, till nicely charred --- as shown in the photo :)

Now go watch TV for the next 45 mins :)


6.) Uncover the rested dough. By this time, it will appear to have doubled in size as it is filled with air. Do not deflate it, but gently divide the dough into 2 parts. Cover and rest again for about 30 mins.

7.) While "dough-rising" Stage-2 is on - Peel the roasted garlic and place in a mixer/food processor along with the roasted onions. Add the sun-dried tomatoes along with their oil and pulse in short bursts till a thick paste is formed. Set aside.
Take a break for the next 25 minutes, till the dough finishes its 30 mins.
(See! I told you this needs very little active kitchen time!)

8.) Once again, Pre-heat the Oven to 180 deg C. While the oven heats, gently pick up one of the 2 dough balls, and roll lightly in your hands.  Place on a floured surface and Roll out into a 1/4" thick circle. (This dough is sticky, so keep dusting it with flour as you roll it out)
Place on a baking tray and bake in pre-heated oven for about 7 mins.


While the base is baking, slice up the veggies for your toppings. Baking the base prior to toppings ensures that it cooks evenly and prevents it from becoming soggy with the toppings. 

9.) Cool the pre-baked pizza base slightly. Spread half of the pizza sauce (this is a thick paste-like sauce) on the base. Arrange half the quantity of the sliced red and Yellow capsicums, radially, to cover the entire pizza. Dot the pizza with half of the chopped olives and sprinkle chopped Basil leaves.
Cover the entire pizza with the grated mozzarella and crumble half of the Feta cheese over the pizza.

Bake @ 180 deg C for 12-15 minutes. Remove from oven on baking and repeat steps 8 & 9 for second pizza.


Rest the fully baked pizza on a wire rack for a few minutes after removing it from the oven to cool slightly... One shall exercise patience and keep oneself from pouncing on the hot pizza, else one shall experience a stinging mouth burn from melted mozzarella if one is being greedy :(

Cut up into slices and Eat up! :)


Sunday, September 4, 2011

Malaysian Mutton Rendang

Cuisine from Malaysia shares a surprising lot on common with its neighboring Thailand.

The most commonly used ingredients of Thai food as I have come to know them (having eaten copious amounts of it!) are Lemongrass, Kaffir lime leaves, and Coconut milk... pretty much equivalents to what Curry leaves (kadipatta), Turmeric and Garam masala are to Indian food.
Marry these Thai ingredients to the Indian influences of Malay food and, Voila! you have Rendang!

Traditionally, this curry is made with beef, but I used fresh boneless mutton instead. Although the prep time is all of 10 minutes, the cook time for this delicious curry is a little generous... almost 2 hours...since it involves slow cooking the mutton in the spices. So plan accordingly if you're thinking of serving this for a dinner party :) This recipe is quantified for 2 persons.


Ingredients:
- 500 g boneless Mutton, fat trimmed
- 1 large Onion, thinly sliced
- 2 cloves Garlic, sliced
- 1" Ginger, sliced
- 2-3 dried Red Chillies
- 1 stalk Lemongrass, bruised & sliced

- 1/2 tsp Turmeric powder
- 1 tsp Coriander seeds, roasted & powdered
- 1 tsp Cumin seeds, roasted & powdered
- 5-6 Kaffir Lime leaves
- 1-1/2 cups Coconut milk, low fat
- 1 tsp Tamarind pulp
- 2-3 tbsp Soy sauce
- 1 medium potato, peeled & cubed
- Salt, to taste

Method:
1.) Cut the mutton into curry sized pieces and place in a bowl.

2.) Grind: Sliced Onion + garlic + ginger + turmeric + dried red chillies+ sliced lemongrass + 2-3 lime leaves , to a fine paste using about 1/4 cup of warm-ish water.

Marinate the mutton pieces in this spice paste along with the roasted coriander and cumin powders, for about 30 mins.

3.) Heat the coconut milk along with 1/2 cup of water in a deep wok(kadhai). Dissolve the tamarind paste into the coconut milk. Once the coconut milk is simmering, add the mutton pieces along with the marinade and stir to mix.

4.) Add the remaining Lime leaves, Soy sauce and adjust salt in the curry as per your preference. Bring the curry to a boil. Lower the heat and bring it down to a simmer.  
(At this stage the curry will be a light creamy brown. Cover partially (not fully) with a lid and let the mutton cook. This will take approximately 1-1/2 hours.)

5.) Open the lid occasionally and stir the curry to ensure that the mutton is always well coated in the masala. This curry darkens gradually and eventually develops into a beautiful dark brown. While the water evaporates to thicken the gravy, you will occasionally need to add some water to keep the curry from drying up and to cook the mutton to perfect tenderness.

6.) Once the mutton is almost cooked to your liking, add the potato cubes to the simmering gravy. Cook further till the potatoes are done. Switch off heat and keep covered.

Be careful when you cover the lid during the cooking process. Allow a small opening for steam to escape, of your curry will boil over and mess up your stove (as I did)

Garnish with some sliced lime leaves and serve along with steamed brown (or white) rice. Eat up!


Sunday, August 28, 2011

Chinese Chicken-Noodle Soup (with its Vegetarian variant)

We spent last weekend in picture-perfect Thailand... eating, drinking, diving, eating, swimming, getting massages, eating, lazing on white sandy beaches, eating... you get the general picture ;)
But we are back to our city lives now... and after a couple of days of being depressed about our vacation coming to an end, we're shamelessly scouting locations for our next holiday :)
While we're at that, we really wanted to go easy on our stomachs and eat light after all the delicious food we stuffed our faces with, so I like a good little girl, I turned to Soup!

Not only are soups filling and delicious, they're easy to make and extremely good for you... And all one needs to do, is patiently allow a bunch of ingredients to bubble away in a basic broth, while you can take a shower, change and generally feel more human at the end of a busy work day.
Inspired from recipes I've been reading on South-east Asian cooking, all you need for this dinner-in-a-bowl is, a bunch of ingredients, a hungry tummy and....  a BIG bowl! :)

Ingredients:
- 250g boneless Chicken
(or 1 chopped carrot + 1 cup chopped french beans)
- 3 tbsp Soya Sauce
- 3 tsp rice wine Vinegar
- 2 tbsp Sesame oil
- 2 Garlic cloves, minced
- 2-3 tsp Sesame seeds,
- 2 tsp Ginger, minced
- 1 tbsp Sugar
- 2 cups Cabbage, chopped
- 6-7 Spring Onions, finely sliced
- 2 cups Chicken or Vegetable broth
- 1/2 packet Chinese pan-fry noodles (or whole wheat spaghetti if you cant find noodles)
- 1/4 cup Coriander, chopped

Method:
1.)  Cut the chicken breast into bite-sized pieces. Transfer to a bowl. Add the Soy sauce, rice wine vinegar, and sesame oil, and allow the chicken to marinate in this for about 15-20 mins.

2.) Toast the sesame seeds on a hot pan and grind a little to form a coarse powder. Whisk together the garlic, crushed sesame seeds, ginger, sugar and some vinegar in a bowl. Set aside.

3.) Bring a pot of water to boil on high heat. Add a tablespoon of salt and Cook noodles till tender. Drain.

4.)  Heat the remaining Sesame oil in a large pan. Add the chopped spring onions and saute for a couple of minutes. Add the chopped Cabbage, and saute till the cabbage is tender. (If making this vegetarian, add the chopped carrots and beans at this point, and saute till tender)

5.)  Add the chicken (or vegetable) broth and bring to a full boil. Add the marinated chicken along with the marinade, and the garlic-sesame mixture. Reduce heat and simmer till the chicken is cooked.

6.) Add the noodles and stir in half of the chopped Coriander. Switch off heat.

Ladle the soup into bowls and garnish with remaining coriander. Add some sweet-chili sauce if you like ( I love it!) and Eat up! :)

*A quick note about the chicken/ vegetable broth... It's basically 2 stock cubes dissolved in 2 cups of hot water, or a can of ready to use broth.*

Sunday, July 10, 2011

Prawn Biryani with Saffron & Carmalised Onions

I know, today's posts are prawn-obsessed... but if you ask me (and my pal Krithika), there is no such thing as "too much prawns" or "prawns too often" :) I made this as a part of a meal I planned for some friends...turned out absolutely yummers! And the best part? If you have the prawns in your freezer, the rest of the ingredients, you will most likely already have in your kitchen...which means... you can whip this up any time :) Quantified to feed 4-5 persons, but feel free to add more prawns and boneless fish if you like!

Ingredients:
- 3 cups Basmati Rice
- 3 cups medium-sized Prawns
- 1 cup Yoghurt (Dahi), slightly tangy
- 2" piece Ginger
- 4 to 5 cloves Garlic
- 2 green Chillies
- 3 large Onions, sliced
- 5 cups hot Water
- 2 Vegetable stock cubes
- 1-1/2 tbsp Red Chilli powder
- 1 tbsp Turmeric powder
- 1-1/2 tbsp Garam Masala
- 2 tbsp Coriander powder
- 1-1/2 tbsp Butter+ 1 tbsp Olive oil
- 1/4 cup Oil for frying Onions

- Whole Spices:
3" Cinnamon stick + 3-4 Black Cardomoms + 4-5 Green Cardomoms + 1 tbsp Black Peppercorns + 3-4 Star Anise + 2 Bay leaves
- 1 large pinch Saffron
- 1 medium bunch Coriander, chopped
- 1 small bunch Mint leaves, chopped
- Juice of One Lime to squirt

Method:
1.)  Wash the Rice and set aside in a bowl with just enough water to keep it soaked. Let the rice soak for about 45-50 minutes.

2.) In a mortar pestle, pound the ginger, garlic and green chillies together till well mashed.
Whisk the yoghurt and add half the Ginger-Garlic-Chilli paste to it along with 1/2 tbsp of Turmeric and some salt. Marinate the prawns in this yoghurt for about 45 mins or so.

3.) Deep fry the sliced Onions till dark brown and caramelized. Drain and set aside on a paper towel to remove excess oil. Dissolve the Vegetable stock cubes in 5 cups of hot water. Set aside.

4.) In a large Handi ( I used a large 5 litre pressure cooker), heat the butter along with the olive oil till the butter is foaming. Add all of the whole spices (as per list above) till they sizzle and are fragrant. Add the remaining Ginger-garlic-chilli paste. Saute for a few seconds.


5.) Remove the excess water from the rice and add to the Cooker. Stir and saute for a few minutes. Pour the hot Vegetable stock into the rice. Stir in the Red chilli powder, Garam masala, Coriander powder and remaining Turmeric powder.Add half of the fried Onions. Reserve the rest to use as garnish.

6.) Add the Prawns along with the yoghurt marinade. Add the chopped coriander and mint leaves and stir well. Add the Saffron threads and Cover and simmer for about 12-15 minutes till the rice is tender and cooked. Switch off heat and keep covered. Allow the Biryani to rest for 5-10 minutes.

Serve immediately, garnished with fried onions and chopped coriander with a squirt of lime juice. Yum! :)


Sunday, June 5, 2011

Real Thai, by Real Thai

Vineet and I are BIG fans of Thai food and have been wanting to cook Thai for a long time now. Although we love the commercially popular, red, green and yellow curries and raw papaya salads of the Thai world, I wanted to try something different ... something that real Thai's cook in their kitchen's regularly... put simply, almost a Aloo-gobhi-daal-chawal equivalent of Indian food.
Sudapim and Panintra, my Thai friends from work, offered to teach me... they shopped for all the ingredients, noted down and very patiently explained how things were done :) This is 100% aunthentic... and I quite enjoyed playing sous chef this time around...
Quantified to feed 2-3 persons, the Thai line-up for this post is:
1.) Thai Raw Mango Salad
2.) Chicken Basil
3.) Thai Chicken Soup
4.) Sudapim's Stir fry Garlic-Shrimp!


THAI RAW MANGO SALAD


Ingredients:
2 medium raw Mangoes
1 large Onion
1 small bunch Coriander, roughly chopped
5-6 tbsp Roasted Peanuts, coarsely ground
3-4 tsp dried Shrimp
1 red Padi Chilli
2 tbsp brown Sugar
1 tsp Fish sauce
2 tsp Soya Sauce
1 Lemon

Method:
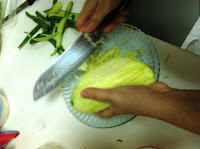
1.) Wash and dry the mangoes. Peel using a vegetable peeler. Cut into thin-match stick- like strips. A traditional Thai technique to make these shredded mango strips is to hold the peeled mango in one hand. Using a sharp knife, make quick dices in the flesh length-wise. Then hold the knife parallel to the surface of the mango, and shave off the shredded pieces. Transfer into a bowl. Set aside.
(This can be tricky and I almost diced my thumb off a couple of times... so if you tend to be as clumsy as me, then stick to the safer option of actually cutting them normally...Will take slightly longer, but at least you have all fingers intact!)

2.) Peel and cut the onion in half. Slice finely, to more or less match the size of the mango strips. Add to the shredded mango.

3.) Finely chop the Padi chilli, shred the coriander leaves by hand and add to the salad bowl. Add the dried shrimp and toss gently.

4.) For dressing: Heat a non-stick saucepan. Dissolve the sugar in about 1/2 cup of water and bring to a full boil. Add the fish sauce and soy sauce and continue to boil till the sauce thickens and becomes sticky. Add the coarsely ground roasted peanuts. Switch off heat and allow the sauce to cool a bit.

5.) Pour the sauce over the salad and toss gently to mix well. Garnish with a few sprigs of coriander and sliced red padi chilli (if you can handle the heat!).


CHICKEN BASIL, THAI STYLE

Made with Minced chicken (kheema), and enjoyed with some piping hot steamed rice!

Ingredients:
250g Chicken, minced (kheema)
1 bunch Thai Basil leaves (sweet basil), torn
3-4 cloves Garlic, minced
2 tbsp Fish Sauce
2 tbsp Soy Sauce
1 tbsp Oyster Sauce
1 tsp Sugar


Method:
1.) Heat the oil in a thick bottomed wok or kadhai. Stir fry the minced garlic. Add the chopped padi chilli followed by the roughly torn basil leaves.
2.) Add the Fish sauce, Oyster sauce and sugar, followed by the minced Chicken. Add the Soya sauce and continue to stir fry till the chicken is cooked. Enjoy with steamed rice.

Warning! The contents of the pan might suddenly catch fire while you stir fry... Don't panic - like I did - and just lower the flame and let the fire go out naturally :)


THAI CHICKEN SOUP (Tom yum kai)

Tom yum soup is a kind of Thai soup that is known for its broth which is both savoury, spicy, and sour. This soup is incredibly flavorful, very light on the stomach and extremely healthy. Sudapim's only special instruction is to not 'stir' the soup as it boils - That might be to allow a slow release of all the flavors of the soups ingredients.

Ingredients:
5-6 Chicken drumsticks
2 large Tomatoes, cut into large chunks
8-10 button Mushrooms, cut in half
1 large onion, cut into large-ish chunks
1-1/2 Knorr Chicken/Vegetable soup cubes
3-4 Lime leaves, cut into thin strips
2 stalks, Lemon grass, bruised
1-1/2" pc of Ginger, sliced into rounds
2 Lemons
2 tbsp Fish Sauce
2 tsp roast Garlic
1 bunch Coriander,roughly chopped

Method:
1.) Heat 3-4 cups of water in a thick bottomed pot. Add the chunks of Onion, Tomatoes and Mushroom, and allow the them to simmer in the water. Dissolve the Knorr soup cubes into the simmering broth.
2.) Bruise 2 stalks of lemon grass using a mortar pestle or the blade of your knife. Add it to the soup, followed by the ginger.
3.) Cut the lime leaves into thin strips and add it to the pot, along with the fish sauce and roasted garlic.
4.) Bring the soup to a full boil. Reduce heat and add the chicken drumsticks. Keep boiling till the chicken is tender and cooked.
5.) Switch off the heat and add the lemon juice and coriander and allow the soup to rest for a few minutes. Tom YUM, Indeed! :)


SUDAPIM'S STIR FRY GARLIC-SHRIMP

This is something chef Sudapim concocted herself... It's a super quick and very yummy stir-fry shrimp, flavoured with basic Thai sauces - fish sauce, oyster sauce and Soya sauce (What's not to like, right?)  The thai padi chilli, adds a lot of heat, so have a glass of chilled water on stand-by! :)

Ingredients:
12-15 Prawns/ Shrimp, shelled & chopped
1-1/2 tbsp Vegetable oil
2-3 Garlic cloves, finely chopped
1 tsp roast minced Garlic
1 red thai padi Chilli
1-1/2 tbsp Soya sauce
1 tbsp Fish sauce
1 tbsp Oyster sauce
1 small bunch Coriander, chopped
1 lime, to squeeze

Method:
1.) Heat the oil in a non-stick frying pan. Stir-fry the chopped garlic and padi chilli.
2.) Add the Fish sauce, the Oyster sauce and the Soya sauce, followed by the roast garlic.
3.) Add the chopped shrimp. Stir fry and cook for a couple of minutes. 
4.) Garnish with copped coriander and a squirt of lime juice.


Sunday, April 24, 2011

KP's Sopa Mexicana

So, for this weeks weekly-food-exploration, I was keen to try something different & delicious, yet healthy. I was wondering which part of the world we'd explore on our plates this week, when I remembered a recipe that Krithika (my sister from another mother, and probably the most loyal reader of my blog) had passed on to me a couple of months ago. She ofcourse had access to the most authentic ingredients, and since I could'nt find them here easily (i.e. at the store next-door!) I decided to substitute a few of the ingredients. The result was a healthy, supremely-delicious and filling, one-bowl-meal, that was perfect at the end of a lazy Sunday evening. 
The list of ingredients is a little exhaustive, but trust me, its worth it! Although the original recipe calls for Taco seasoning, I used dried Oregano since I couldn't find any. This version uses boiled chicken, and chicken stock as a base, but can easily be made vegetarian by using vegetable stock instead and enjoyed with some toasted bread. 
Comer bien a mis amigos! :)


Ingredients:
200g Boneless Chicken (2 lbs)
2 tbsp Olive oil
1 Large onion, finely chopped
2-3 cloves Garlic, finely chopped
1/4 cup Celery, finely chopped
1/4 cup Carrot, finely chopped
1/2 Green capsicum, finely chopped
1 cup Rajma beans (soaked,cooked)
7-8 Cherry tomatoes, halved
1 Avocado, cubed (1/2" pieces)
4-5 tbsp Oregano flakes
2-3 tsp Black peppercorns, cracked
1-1/2 tsp Red chilli powder 
Salt, to taste
4-5 tbsp Coriander leaves, chopped 
1/2 cup Cheddar cheese, grated


Method, if Using Chicken:
1.) Cut the chicken into curry sized pieces. Put into a microwave-safe container. Pour about 1-1/2 cups of water, and microwave for about 5-6 mins till chicken is cooked. Remove the boiled chicken and set aside to cool. Store the broth (the water) as this will be the base for your soup.
2.) While the chicken boils, Heat the oil in a saucepan. Add the chopped Onion & Garlic. Saute till the onion is golden and softens. At this point, add the chopped Celery, Carrots & Capsicum. Cook till soft.
3.) While the contents of the pan are still cooking, shred the chicken pieces using a fork. Add the shredded chicken to the pan and stir to mix well. Add the cooked Rajma beans (black beans) and mix well. 
4.) Add the chicken broth and allow the soup to simmer for a few minutes. Add the chopped Avocado & cherry tomatoes. Add the cracked Black pepper, dried Oregano leaves, Red chilli powder and salt.
5.) Add the chopped Coriander leaves, and let the soup bubble away for a few minutes.
6.) Squeeze the juice of about 1-1/2 limes into the soup. Serve hot garnished with shredded Cheddar cheese. Yum!

To make this Vegetarian:
Leave out step 01. Begin with step 02 and follow through Step 03. Dissolve 1-1/2 cubes of Vegetable stock in 1-1/2 cups of warm water. Add in place of chicken broth in step 04. Proceed with the rest of the recipe as usual.

Saturday, April 16, 2011

Greek Lamb Burgers with Tzaziki, Aurugula & Feta

As someone who loves to cook, and being married to someone who is more that willing to be adventurous with food, I have found myself not doing justice to our willingness to try out foods from different parts of the world. So this week, we made a decision. Starting yesterday, we have solemnly promised ourselves to try making atleast ONE meal a week, something we'd never cooked before, and from a part of the world that we have'nt necessarily been to but hope to see someday.

I have been fascinated with Greece for a long time now. It features in the top 3 on my list of places I want to travel to before I die. Having never cooked 'Greek' food before, the world was my ocean. I found that Greek cuisine shares a lot in common with food from other parts of the Mediterranean, including extensive use of Olive oil, meat, olives, cheeses and yoghurt. The food is extremely flavorful, with the natural flavors of the ingredients coming through, and a refreshing change from our regular Indian cooking.

So here comes post no.1 on my list of Weekly-food-explorations, a flavorful Minced lamb burger with Greek Tzatziki, Arugula and feta cheese, a combination resulting from mixing three recipes that I shortlisted from www.epicurious.com. Makes 4 generous sized burgers.


'Tzatziki' is a Greek yoghurt sauce that is usually served as an accompaniment and eaten with pita bread. Here it is used as a dressing for the burger. Make this ahead, so you can allow it some time to chill in the refrigerator, while you get on with the burgers.
Ingredients for Tzatziki:
1 cup Yoghurt (hung, strained)
1 medium Cucumber, peeled
6-8 Fresh mint leaves, chopped
2 cloves Garlic, finely chopped
2 tsp Dijon mustard
1 tsp Honey
Salt, Pepper to taste
Method for Tzatziki:
1.) Hang the yoghurt in a clean muslin cloth to drain it of most of its water content.
2.) Peel a cucumber and grate finely. Grate only the outer fleshy part. Discard the seeds or just nibble at them while you cook. Using a strainer, squeeze out as much water as possible from the cucumber.Transfer in to a bowl.
3.) Add the rest of the ingredients and the hung yoghurt and mix well. Chill till its time to assemble the burgers.


Ingredients for Burger patty:
400 g Lamb, minced (kheema)
3 tbsp Bread crumbs
1 medium Onion, finely chopped
4 cloves Garlic, finely chopped
12-15 mint leaves, chopped
2 tbsp Oregano flakes
2 tsp ground Cinnamon
1 tsp Red chilli powder
2 tbsp Milk
Salt & Pepper, to taste.

Method for making the Patties:
1.) Put the chopped onions, breadcrumbs,mint, garlic into a mixer or food processor. Puree in short bursts (on 'pulse' mode) till combined. Transfer into a large mixing bowl.
2.) Add the minced lamb to the bowl. Add the ground Cinnamon, Red chilli powder and splash the milk into the lamb.Rub both hands well with olive oil and knead the pureed mixture into the lamb till well integrated. Season with salt and pepper and mix well.
3.) Divide the lamb mixture into four parts for generous sized patties or six for regular sized patties. Roll them between both palms into balls and flatten into a patty about 3/4" thick. Make all the patties.

 4.) Heat a stove-top grill pan. Brush it with a little olive oil. Once hot, grill the patties till they're nice and browned and cooked through- about 5-6 mins each side. Transfer onto a paper towel to drain.


Ingredients for assembling the Burger:
4 Burger buns / or / Pita breads
1 large Onion, thickly sliced
1 large Tomato, sliced
1 cup fresh Arugula leaves /or/baby Spinach
5-6 tbsp crumbled Feta cheese
1 Bowl Tzatziki sauce, as per recipe below
4 Burger patties, as per recipe below

Method for Assembling the Burger:
Slice the burger buns in half. Spread a little Tzatziki on the lower half. Lay out the baby arugula / or baby spinach leaves. Lay the patty on top, followed by the sliced onions and tomato. Top it off with another dollop of Tzatziki and Arugula leaves. Sprinkle the crumbled Feta and finish with the top half of the bun and insert a toothpick all the way through to hold it all together. Eat up!

These burgers turned out absolutely brilliant. I would've preferred to be more authentic and actually stuff these patties and other goodies into a toasted pita bread, but sadly din't find any :( The mint and oregano were delicious together and the splash of milk in the patty made the burgers really juicy, while the bread crumbs helps bind the patty together. Nice. Real nice! :)