As someone who loves a good meal, cooking one, came to me as a natural passion. I belong to a family where meal times consisted of not just food, but also noisy conversation centered around the events of the day and discussing the menu for the next. (ah yes, we are a greedy lot! )

For the most part of my life so far, my contribution in the kitchen was assisting mom and my duties were limited, to chopping veggies and laying the table. Then along came the great Indian wedding, and I was suddenly the queen of my very own kingdom. My curiosity about this magical world, coupled with an enthusiastic sous-chef (my husband, Vineet), led me to take on the challenge of preparing meals on a daily basis, and not succumbing to the convenience of hiring a cook.

This blog is a product of my experiments with food (not all are life threatening :D) for my fellow culinary enthusiasts - especially the newly weds and hungry bachelors and is dedicated to the women who've inspired me in the kitchen;
Aji (s),Ma and Nigella Lawson.

Showing posts with label Vegetarian. Show all posts

Saturday, November 9, 2013

Roast Corn & Black Bean Salad with Avocado

Salads are one of my most favourite things to make. They're healthy, packed with flavour and come together so quickly! I made this roast-corn salad to go alongside a simple grilled chicken breast for dinner a couple of weeks ago. Strongly recommend this festive looking salad for your next potluck party / BBQ party! :) Bon appetit!

(Click on image for a larger view)


Tuesday, September 3, 2013

Black rice salad with Mango & Avocado

Hello all! I have been meaning to revamp the format for CCG for a little while now. Have worked out a simple format that will allow you guys to download future recipes as a jpg/ jpegs. As a regular user of food apps on my iPhone, I am very conscious of the fact that most of us use our phones to replace recipe books in the kitchen and as I am not particularly impressed with the mobile view that blogger offers, I thought it was worth trying this format out. Do let me know what you think and if this format of recipe presentation made your life infinitely better :) hehe! 

Ok, now on to the recipe.

A couple of years ago, a friend of mine from work introduced me to a nice little salad &sandwich place at Takashimaya (Ngee Ann City) called Marmalade Toast. It has a delightful selection of salads, wraps , sandwiches and stone fired pizzas at fairly (and surprisingly) reasonable prices, considering their location. I simply LOVE their wild rice salad with apple and raisins and have been itching to recreate it at home ever since. Somewhere down the line, I forgot all about it till recently when I came across an asian-style rice salad.
As usual I set about researching how to cook/store wild rice. Unfortunately, the grocery store near where we live doesn't sell any, so I decided to replace it with Black rice instead.
Black rice has always been a bit of a mystery to me. All I knew about it (besides its fab flavour) was that it used to be served only to royalty in imperial China. So I bought a bag of it (as I consider us nothing less than royalty!) and read up on its uses and cooking instructions while in the check out line.
To my delight it was easy-peasy to cook and not at all as sticky as I thought it would be!

I love salads that have an interesting mix of ingredients that keep your taste buds and eyes interested. I used fresh mango and avocado along with a lime-olive oil- honey dressing with plenty of fresh cilantro (coriander) for this salad. It was a vibrant and delicious side to the grilled fish main that we enjoyed on Saturday night (after the baby was tucked into bed for the night) ;)

(Click on the image for a larger view)


Sunday, August 18, 2013

Stuffed Baby Potatoes

I have been away far too long from CCG...and for good reason too! For starters, I am now writing a second cooking blog alongside this one. This new blog (http://cookingforkeya.wordpress.com/) features easy to make recipes for babies, toddlers and young children. For those of you who did not know that... check it out! Do leave me your comments and pass on the link to your friends & families if you think it's any good! :-)

I also switched jobs last month. That, coupled with managing Keya's growing demands on our time and energy when we are home on weekends... leaves us with little time to do much else. Oh well... Since she is now happily engaged and playing with her stuffed dragon in her cot (thank you Nalanda & Suchet for the awesome toy!), here I am grabbing my chance to write!

Now about this recipe- When I am having a mixed gang of people over, I have found that it is often a little tricky to create appetizers for vegetarians, that can stand up to their non-vegetarian counterparts. I mean, there is only so many times that you can get away with chips and dip or cheese-pineapple sticks when the meat-eaters are happily gorging on their kebabs and tikkas! So vegetarians... roll up your sleeves and dig into this one! It  involves a wee bit of effort and packs a ton of flavour! A great choice to serve up at your next dinner party!

Ingredients:
- 12 to 15 Baby potatoes, washed (skins on)
- 2 tbsp Olive oil
- 1 small onion, very finely chopped
- 3 tbsp Cream cheese
- 3 tbsp plain Yoghurt
- 1-1/2 tsp Dijon mustard
- 1 tsp dried (or 2 tsp fresh chopped) Mint
- Small bunch Coriander or Parsely, chopped
- Salt & Pepper, to taste


Method:
1.) Preheat your oven to 200 deg C. If you do not own an oven - a thick bottomed non-stick skillet will do.

2.) Wash the baby potatoes and drop them into a pot of simmering, lightly salted water. Steam/ boil till fork tender. Drain the water and cover the cooked potatoes with a clean towel for a few minutes and let them rest till cool enough to handle.

3.) Slice off a little bit of the potatoes on two sides, such that one flat side helps the potato 'sit' on the plate and the second flat side is on top. Using a teaspoon or a melon baller scoop out some of the insides of the cooked potato such that you now have a bit of a hole inside.

4.) In a seperate bowl, whisk the cream cheese, yoghurt, dijon mustard, and mint. Check for taste and season with salt and pepper as per your preference. Chill till its time to use.

5.) In a bowl, toss the scooped potatoes along with the olive oil and some salt and pepper. Place on a foil-lined baking tray and bake till the skins are golden and a bit wrinkly (about 7-8mins). Alternatively, heat your non-stick skillet or pan and toss the scooped, oiled potatoes till the skins take on some colour. You will NOT need to add any additional oil to the pan.

6.) Scoop the chilled filling into the baked potatoes and garnish with some freshly chopped coriander and/ or mint. Serve immediately!

Steps 1-4 can be done in advance if you are making this for a party. Steps 5 & 6 could be done right before its time to serve. The chilled filling inside the hot potato is a delicious contrast that your guests will love!

Bon appetit! :)

Sunday, May 26, 2013

BBQ Party Potato Salad


Poolside BBQ's are a popular choice among folks here in Singapore. The warm sunny weather all-year round, and the fact that our poolside is dotted with family sized BBQ pits, makes impromptu parties a fun, welcome way to spend a Saturday evening.
This modest chilled Potato Salad uses very standard pantry ingredients and comes together in barely 10 mins (not counting the time needed to boil the potatoes of course!). It works as a refreshing, tangy contrast to the smoky flavours of BBQ'd meat and veggies. I'd recommend making this a couple of hours in advance and then covering it and allowing it to chill before serving.
I plan to experiment a little more with this recipe the next time I make it by roasting the potatoes instead of steaming them... but if any of you readers beat me to it, let me know how it turns out! :)


Ingredients: (Serves 4-5 persons)
- 1kg baby potatoes, steamed till tender
- 1 large red Onion, halved and thinly sliced
- 3/4 cup regular or eggless Mayonnaise
- 1/4 cup Dijon mustard
- 2 cloves Garlic, grated
- 1-1/2 tsp Lime juice
- 1-1/2 tsp cracked black Pepper
- 1 tbsp dried Chilli flakes
- 2 tbsp fresh /OR/ 1/2 tbsp dried Mint leaves
- 1 small handful of Coriander, roughly chopped
- Salt, to taste


Method:

1.) Slice the cooled baby potatoes into rounds, not too thin, but thick enough to pick up with a fork.  Set aside. Peel the potatoes if you must before you slice, but I left the skins on.

2.) In a bowl, whisk together the mayo, dijon mustard, grated garlic and lime juice to make the salad dressing. Add the cracked black pepper, chili flakes and mint. Mix well.

3.) Pour the dressing over the potato followed by the sliced red onion and mix gently to coat the potatoes evenly. Do a quick taste- test and season the salad with some salt.

Cover the salad with some plastic wrap and chill in the refrigerator for atleast 30mins. Garnish with a handful of chopped coriander right before you serve. Enjoy! :)


Sunday, February 3, 2013

Roast Garlic, Broccoli & Pea Soup


Been meaning to upload this recipe for the past couple of days, but something or the other got in the way - but tonight, on the eve of my return to work after 5 months of maternity leave, here I am, finally writing!
Whipped this up with some left over Broccoli for a healthy lunch. Broccoli by itself is rich in Vitamin C and an excellent source of fiber. I love plain steamed Broccoli with just a dash of butter, but felt that the soup needed a little more. So in went the frozen peas, pushing the health quotient of this soup a notch higher. I love the flavour of roasted garlic, as it tastes fabulous and not as garlicky as you would expect, but also the caramalisation while roasting, makes it deliciously sweet, so in went a bulb (yes, a whole bulb!). If you are too lazy to use the oven to roast the garlic, you could try wrapping it in a foil and using a thick bottomed pan to do the trick. But if you do decide to skip the roasting and simply saute the garlic, then I suggest using half the quantity indicated below.
Make this and enjoy with some toasted bread, steamed corn, and you have a light, simple & healthy meal in no time at all!

Ingredients: (Makes about 4 servings)
- 1 medium head of Broccoli, cut into florets
- 1 cup of fresh/ frozen Green Peas
- 1 bulb of Garlic, with peel
- 1 large Onion, sliced thickly
- 1.5 Chicken OR Vegetable stock cube
- 1/2 cup low fat Milk
- 3-4 tbsp Olive Oil,
- Salt & Pepper, to taste
- 1 cup Feta cheese, roughly crumbled


Method:
1.)  Preheat oven to 200 deg C. Place whole bulb of garlic (with peel) and the onion slices on a baking tray lined with aluminum foil. Drizzle with some Olive oil, and season with salt and pepper. Roast for about 12-15 mins on a low rack (not too close to the heating coil), or till the garlic and onion are golden brown.

2.)  Bring a pot of water (lightly salted) to a rolling boil. Reduce to a simmer and cook the Broccoli florets and Peas till soft. Drain the veggies, but retain 2 cups of the water used to boil (you don't want to lose any nutrients!). Dissolve the chicken / vegetable stock cubes in this water. Transfer the stock to a saucepan/ pot in which you want to ultimately cook the entire soup. Save a few of the boiled broccoli florets, to use as a garnish for later.

3.)  Puree the - boiled Broccoli, Peas, Roasted (cooled & peeled) Garlic and Onion - till smooth. Add some of the stock water to thin out the veggies to help the process.

4.) Add the pureed veggie mix in to the saucepan with the stock water. Add the milk and bring to a full boil before turning off. Check seasonings and add salt/ pepper to suit your palette.

5.) Ladle into soup bowls. Garnish with the crumbled Feta cheese and reserved boiled Broccoli florets & Enjoy right away! 

Thursday, December 13, 2012

Green Bean Salad with Olives & Feta


I love green beans but had somehow never eaten them in salad form... Vineet who will eat beans only if they are cooked a certain way, was skeptical about trying this out, so I made myself this salad for lunch yesterday, just to take the recipe out for a spin... and man! o man! 
I'm more than certain Vineet is going to gobble this up on Friday night when I make it for him along side some Buttermilk roast chicken (found here)

Green beans are rich in Vitamins A, C & K, are high in fiber and are also a source of Potassium & Iron. In short, they are extremely good for mom... and dad...and grandma...and grand pa ... well, you get the point. The Olives and Feta bring the unassuming Green beans to life and the Sundried tomato dressing is just soooo good that I promise you will be licking it straight out of the food processor!

As more and more of our friends join us on the ''other side'' and are becoming parents, I plan to develop this new section with recipes for new moms, easy, breezy, healthy and delicious that will ensure that the new parents, especially mothers are well nourished... taking care of a small, precious yet surprisingly loud and shockingly opinionated baby isn't for the faint-hearted after all!

Ingredients: (Serves 2 as an appetizer)
- 2.5 cups Green/ French beans, halved
- 1 medium Onion, sliced
- 1/2 cup pitted Kalamata Olives,halved
- 1/4 cup Feta cheese, roughly crumbled
- 1/2 tsp cracked Black pepper
For Salad dressing:
- 1/4 cup Sundried Tomatoes in Oil, roughly chopped
- 1 large clove Garlic, peeled
- 2 tsp Balsamic Vinegar
- 2 tsp Extra virgin Olive oil (EVOO)


Method:
1.) Bring a pot of salted water to a rolling boil. Cook the beans for just 2 mins and quickly transfer into a bowl with chilled iced water to keep them from over cooking. Drain the beans in a colander and set aside.
2.) To make the salad dressing, place all the ingredients except the EVOO in a food processor and roughly chop. Open the lid, scrape down the sides of the mixer and now add the EVOO and blitz again to form a chunky paste.
3.) Transfer the beans into a salad bowl. Add the sliced Onion and Olives. Add the sundried tomato dressing and toss gently to coat all the veggies. Season the salad with some cracked black pepper and add the crumbled Feta cheese to the party!

Chill in the refrigerator till it is time to eat. This salad will work as a beautiful side- dish to grilled chicken or lamb... mmm... Eat up!

Monday, January 2, 2012

Wicked Apple-Cherry-Whiskey Pie with whipped cream & Berries


 While the last year decided to zip by all of us in the blink of an eye, 2012 made a quiet yet fun entry into our lives. Much like last year, I was in the mood to try out some exciting food to treat ourselves to as we celebrated the last evening of 2011 with friends over drinks, great food and all night poker...
For the past few months now, I've been wanting to bake a pie from scratch... crust and filling. So when I came across beautifully crisp Granny Smiths (what green apples call themselves when they want to be fanciful) I knew it had to be an Apple Pie. I used a very simple, very basic pie crust recipe, which came from reading a LOT of pie recipes with a deliciously wicked sweet-sour-cinnamon-y filling with a serious whiskey kick... I cannot insist enough, that you go try this one this coming weekend !


Ingredients: For Crust
- 2 cups All-purpose flour
- 3/4 cup powdered Sugar
- 1-1/2 tsp Baking powder
- 1/2 tsp Salt
- 3/4 cup chilled unsalted Butter
- 1/4 cup iced Water + more

Ingredients: For Filling
- 6 medium sized Granny Smith apples
- 1 cup dried Cherries (pitted)
- 1/2 cup Scotch whiskey
- 1/2 cup golden brown sugar
- 2 heaped tsp, ground cinnamon
- 1/2 Lime

Whipped cream & blueberries & raspberries to serve.

Special Equipment:
- Food processor / Mixer
- 1 x 9" Glass / Teflon coated / Aluminum foil Pie dish
- Aluminum foil , to protect edges of the pie while baking
- Plastic wrap


Method: For Crust
1.) Place the first four ingredients in the food processor and pulse 3-4 times till well combined. Add the butter and pulse again till a coarse bread-crumb like texture. Start adding the iced/ chilled water little-by-little till moist clumps are formed. Add a couple of more teaspoons of the water till a dough is formed.
2.) Turn out the slightly sticky dough onto a floured surface. Dust your hands with some plain flour and knead the dough into a smooth ball. Dont over-knead, or the heat from your hands will begin to soften the butter. Divide the dough in half. Wrap in plastic wrap and flatten between your palms into a disk. Chill in the refrigerator for about 40-50 minutes.

Method: For Filling
1.) While the dough chills, marinate the dried cherries in the Scotch. Set aside for about 30 mins.
2.) Peel and core the apples. Cut in half and make thin slices. Squirt some lime juice over them to keep them from oxidizing. Stir in the golden-brown sugar and ground cinnamon.
3.) Stir in the marinated cherries along with the whiskey . Toss the apples and cherries together.

To assemble pie:

1.) Roll out one of the chilled dough disks on a lightly floured surface till its about 13" in diameter.... should be large enough to fill the pie dish base and sides with about 1/2" extra all around to help "crimp" the crust.


2.) Gently lift the rolled out dough and lay into the pie dish. Press down super gently with your fingers to make sure that the crust is even.

At this point, preheat your oven to 190 deg C (375 deg F).


3.) Arrange the sliced apples in a spiral fashion and distribute the cherries evenly through out the filling. Retain the whiskey-cinnamon juice - I used this to make the glaze.

For glaze, heat these remaining juices in a saucepan. Let it bubble away till it begins to get sticky and thicken. Switch off heat and let it cool slightly.


4.) Pull out the second dough disk. Roll out to make the top crust. Dust hands lightly with flour. Pick up the rolled out dough gently and lay it over the filled pie. Using your fingers pinch the edges of the pie to seal in the filling.

Using a sharp knife, make small cuts all over the pie shell. These will help the steam from the fruit escape, and prevent a apple explosion in your kitchen ;) 

5.) Brush the cooled glaze all over the pie - EXCEPT on the crust.

6.) Bake at 190 deg C for about 10 minutes. Remove from oven and cover the edges of the pie with aluminium foil. Pop the pie back in the oven and bake for another 50 minutes, till apples are tender and crust is golden.

7.) Allow the pie to cool till warm / or room temperature - whichever you prefer.

I like it slightly warm because I love the contrast of the warm pie against the cool whipped cream and berries.


Eat up greedily, licking off every crumb off the plate.... (probably don't need to tell you that! )

Sunday, October 2, 2011

Home-made Whole-Wheat, Thin crust Veggie Pizza with Roast-Garlic & Onion Sauce

Vineet and I were in a mood to celebrate my blogs first birthday. Pimm's & Lemonade was on the menu, but we were wondering what one-dish meal it could be paired with, that would allow us to enjoy some much needed downtime at the end of a long week.

It's been a while since I had done any Bread-related baking, and I have been itching to make thin-crust Pizza at home, since there are few places (all very expensive) that make this just like I like it.... crisp crust, smokey flavours and not drowning in a pool of melted cheese... So the decision was made...

Home made Pizza sure might sound like a lot of work... But if I told you, that my active time in the Kitchen was about 40 mins TOTAL - which included making the pizza base and sauce - you will probably find that hard to believe.

Before I get on with the actual recipe... the total time for this pizza is about 2-1/2 hours... of which 1 hour 20 mins is spent watching TV or playing Poker... I promise :) Here's how;


Ingredients | Pizza Base:
- 1/2 cup Whole Wheat flour (atta)
- 1/3 cup All-purpose flour (maida)
- 1/4 tsp Salt
- 1/3 cup + 2 tbsp Warm water (not hot!)
- 1/4 tsp white Sugar
- 1 tsp Active Dried Yeast
- 1 tsp Olive Oil
   
Ingredients | Pizza Sauce:
- 5-6 large large cloves, Garlic (with peel)
- 2 medium Onions, cut in half and thickly sliced
- 2 tsp extra-virgin Olive oil
- 1/2 cup Sundried Tomatoes in oil
- Salt, if needed, as per taste

Ingredients | Pizza Toppings:
- 1 medium Red Capsicum, sliced
- 1 medium Yellow Capsicum, sliced
- 1 cup pitted Kalamata Olives, sliced into rounds
- 10-12 Basil leaves, chopped
- 1 cup Mozzarella cheese, grated
- 1/2 cup Feta Cheese, crumbled

STEP-BY-STEP INSTRUCTIONS TO MAKE THE PIZZA

1.) Measure out the Flours in a clean dry Glass bowl/ non-metallic bowl. Stir in the Salt and set aside...(Yeast reacts badly with metal surfaces...so, no metal spoons for measuring either!)

2.) Dissolve the sugar in the warm water. Add the yeast into the water and set aside for 10 minutes. At the end of 10 mins, the yeast will have expanded and look frothy... at this point. Add the olive oil into the yeasted water. *PREHEAT OVEN TO 180 deg C at this point*. ( BTW.. If the water is too hot it will 'kill' the yeast.. so make sure its temperature is something you can easily dip a finger into)


3.) Make a well in the flour, and slowly pour the yeast-water-oil mixture into it. Start mixing gently using your hands. The dough begins to pull-away from the sides of the bowl. Transfer to a lightly floured, non-metallic surface and knead for about 8-10 mins till a soft pliable dough forms.


4.) Place the kneaded dough back in the bowl and cover with a clean cotton cloth. Set aside in a warm place for the next 45 mins. Get on with the prep for the Sauce.

5.) Chop off the ends of the garlic, leave on the peels. Arrange the garlic cloves and sliced onions on a baking sheet. Drizzle with the olive oil. Put baking sheet in the pre-heated Oven, and bake for 45 minutes, till nicely charred --- as shown in the photo :)

Now go watch TV for the next 45 mins :)


6.) Uncover the rested dough. By this time, it will appear to have doubled in size as it is filled with air. Do not deflate it, but gently divide the dough into 2 parts. Cover and rest again for about 30 mins.

7.) While "dough-rising" Stage-2 is on - Peel the roasted garlic and place in a mixer/food processor along with the roasted onions. Add the sun-dried tomatoes along with their oil and pulse in short bursts till a thick paste is formed. Set aside.
Take a break for the next 25 minutes, till the dough finishes its 30 mins.
(See! I told you this needs very little active kitchen time!)

8.) Once again, Pre-heat the Oven to 180 deg C. While the oven heats, gently pick up one of the 2 dough balls, and roll lightly in your hands.  Place on a floured surface and Roll out into a 1/4" thick circle. (This dough is sticky, so keep dusting it with flour as you roll it out)
Place on a baking tray and bake in pre-heated oven for about 7 mins.


While the base is baking, slice up the veggies for your toppings. Baking the base prior to toppings ensures that it cooks evenly and prevents it from becoming soggy with the toppings. 

9.) Cool the pre-baked pizza base slightly. Spread half of the pizza sauce (this is a thick paste-like sauce) on the base. Arrange half the quantity of the sliced red and Yellow capsicums, radially, to cover the entire pizza. Dot the pizza with half of the chopped olives and sprinkle chopped Basil leaves.
Cover the entire pizza with the grated mozzarella and crumble half of the Feta cheese over the pizza.

Bake @ 180 deg C for 12-15 minutes. Remove from oven on baking and repeat steps 8 & 9 for second pizza.


Rest the fully baked pizza on a wire rack for a few minutes after removing it from the oven to cool slightly... One shall exercise patience and keep oneself from pouncing on the hot pizza, else one shall experience a stinging mouth burn from melted mozzarella if one is being greedy :(

Cut up into slices and Eat up! :)


Blueberry & Yoghurt Breakfast Smoothie

Another super yummy, super healthy, super quick breakfast in a glass.. using all of 3 ingredients - fresh Blueberries, Yoghurt and Honey. Can't possibly write a longer introduction for something that is made in just a few minutes :) But yes, I have to tell you that Blueberries are excellent fat  busters, are high in anti-oxidants and maintain healthy urinary tract and visual health. See this link for more information: http://www.sciencedaily.com/releases/2009/04/090419170112.htm

Ingredients: (Makes 2 glasses)
- 1 cup fresh Blueberries, washed & drained
- 1-1/2 cups plain Yoghurt
- 2 or 3 tbsp Honey

Method:
Stick everything in a blender and whirrrrrrrrr away. Add a couple of teaspoons of water to thin out the smoothie if its too thick. Garnish with a couple of blueberries, and Drink up!

Monday, September 26, 2011

Home-made Yoghurt Dip & Chips

Ok, this super easy party appetizer is something that my aunt ( mum's sister) makes very often, and its always the thing that disappears the fastest each time she makes it. It has the creami-ness of cream cheese, minus all the high fat ... the natural tang of the yoghurt and the crunch of the onions and green capsicum... its seriously finger lickin' good, and the only hard part is... is watching it swiftly disappear, while you're left wishing you had made more, so you'd have left overs to greedily eat after the party is over ;)


Ingredients:
- 4 cups Yoghurt ( makes 2 cups of dip)
- 1 medium Onion, very finely chopped
- 1 small Green Capsicum, very finely chopped
- 1 small bunch fresh Coriander, very finely chopped
- Salt & cracked Black Pepper, to taste

Method:
1.) Line a deep bowl with a clean, dry fine muslin/cotton cloth. Scoop the yoghurt into the cloth and tie the fabric in a knot to create a pouch. Hang over the sink, or place a bowl underneath to collect the water from the yoghurt as it drains. Let it hang for atleast 4-5 hours ( or more, depending on the quantity of yoghurt)

2.) Transfer the thick, hung-yoghurt into a mixing bowl. Whisk together along with all of the other ingredients. Garnish with a little sprinkling of chopped capsicum and/ or coriander...and Voila! You're Done! :)

Chill in the refrigerator till its time to serve alongside chips of your choice! Eat up! ;)


Sunday, September 25, 2011

Roast Corn, Sour Cream & Feta Crostini

Menu planning for dinner parties is a lot of fun! Its a great opportunity to explore new recipes, and having an appreciative and hungry audience, is added motivation. I tried a Corn & Feta Crostini for a dinner party that we hosted for our dear friends Seema & Ganesh, and my cousin, Samar, last night. I wanted to keep appetisers light, and something that would pair well with the Fresh Green Grape Sangria that I planned to serve, to get the evening started off... So well... this is how you make it ...

Ingredients:
- Ciabatta bread, 1 leaf (or 1 Baguette)
- 1/2 cup Sour Cream ( or hung yoghurt)
- 1/4 cup crumbled Feta cheese
- 1 ear of Corn
- 1/4 cup, Coriander, leaves seperated
- 1 tsp Red Chilli powder
- Lime wedges, enough to squirt lightly

Method:
1.) Preheat oven to 180 deg C. Slice the bread loaf into 1/2" thick slices. Toast in hot oven for about 3-4 minutes, till crisp and warmed.

2.) While the bread toasts, whisk together the Sour Cream and feta together. Roast the corn on the gas flame till sufficiently blackened in parts. Using a sharp knife, slice off the roasted corn kernels into a bowl.

3.) Smear the Sour cream-feta mixture on the toasted Ciabatta. Top with the roasted corn kernels. Lightly sprinkle some of the Red Chilli powder on top and squirt some lime juice onto the topping.

Garnish with a leaf of Coriander, and serve asap along with some delicious Grape Sangria and be transported to yumminess-heaven ! :)


Sunday, September 11, 2011

Coconut- Date- Sesame Fudge Bars


I recently came across a recipe for Raw Fudge Brownies, that a friend from school, Reshma, made and posted on the blog she writes for healthy eating & living. Her recipe got me all excited about using dates in desserts, since they're not only gooey and deliciously fudge- y  but packed with several key nutrients like Vitamins, Calcium, Iron,Potassium and Magnesium. They're an excellent source of fiber and help maintain top-notch digestive and cardiac health.
I had a LOT of dessicated coconut in my freezer from last weeks coconut cupcake, so I decided to experiment a little... and since I was looking to make this healthy, I added some Oat cereal and Cornflakes.
So, well, here it goes, my Date-Coconut-Sesame fudge... sticky, gooey, yummy ... and healthy :)


Ingredients:
2 cups seedless Dates (khajoor), roughly chopped
5-6 dried Apricots (optional), roughly chopped
1 cup unsweetened Dessicated coconut
1 cup breakfast Cereal - Cornflakes / Oat cereal (either or both)
1/2 cup Pine nuts / Or / roughly chopped Almonds
1/2 tsp Honey
3-4 tbsp Sesame seeds

Method:
1.) Preheat oven to 180 deg C. Toast the Cornflakes and/or Oat cereal for 5-6 mins till they're super crunchy. Alternatively, heat a non-stick pan on medium heat. Toast the cereal stirring occasionally till its crisp. Set aside in a dry bowl to Cool.

2.) Toast the Pine nuts/ or / chopped almonds. Add to the bowl with the toasted Cereal.

3.) Now, toast the dessicated coconut till it begins to turn slightly golden. Switch off heat immediately or it will brown too much.


4.) Transfer the toasted Cereal and Nuts into a mixer / food processor. Pulse till coarsely powdered. Start adding the dates, about 1/4 cup at a time, and pulse till combined after each addition. As you pulse, the stickiness of the dates will begin to bind the mixture together.


5.) Add the toasted dessicated Coconut to the date mixture 1/4 cup at a time, and pulse again till well combined. Although it binds extremely well, this mixture is surprisingly non-sticky,and pulls away from the sides of the mixer very easily.


6.) Line a baking tray/ glass casserole with grease-proof paper or aluminum foil. Turn out the mixture into the bowl. Using your fingers , apply pressure on the mixture, and flatten into the bowl to form a layer which is uniformly thick (about 1/2" thick).


7.) Cover with a lid or foil and chill in the refrigerator for about 30-45 minutes. Meanwhile, toast the Sesame seeds and cool. Brush the honey lightly, over the top of the set fudge. Lightly pat the toasted Sesame seeds onto the fudge using slight pressure from your fingers to stick.
Holding the foil, extract the fudge from the bowl. Using a sharp knife, divide into 2" x 2" squares ( or 1" x 3" rectangles).

Store in an air-tight container in the refrigerator. Should keep well for about 7-8 days, but that's IF it lasts that long! :)


Sunday, September 4, 2011

Fred's Couscous Salad

Although I love it,Vineet isn't the biggest fan of Couscous. So when I tried this salad that Fred, a friend from work, made for a potluck birthday party recently, I knew it was going to be something that would convert my Couscous-shy husband... reason being, it had all of his other favourites, olives, feta and sundried tomatoes :)

Couscous is made from Semolina (rava/ sooji) that is used widely in middle-eatern cuisine. It is soaked in hot water till it swells and becomes fluffy. Eaten as a side, much like rice or pasta, along with curried meat or vegetables, it has a soft grainy texture that readily absorbs flavoursand is yummy when used in Salads.

Couscous is among the healthiest of grain-based products. It has more fiber, vitamins and protein  than pasta and rice and has is excellent for a low-cal diet.See this link for more detailed health benefits of Couscous.

Ingredients:
- 200 g / or 1 cup Couscous
- 1-1/2 cups HOT water (not boiling)
- 4-5 tbsp Balsamic vinegar
- 5-6 tbsp Extra-virgin Olive oil
- 1 cup french Beans, chopped into 1-1/2" long pieces
- 1 cup Kalamata olives, pitted & sliced
- 3/4 cup Feta cheese, crumbled into biggish chunks
- 8-10 strips of Sundried tomatoes in oil, chopped
- 1/2 cup chopped fresh Parsley

Method:
1.) Place the Couscous in a bowl. Mix the Balsamic vinegar and Olive oil with the hot  water and pour over the couscous. Give it a quick stir and cover with a lid tightly. Set aside for 7-10 mins. The Couscous absorbs the liquid and fluffs up.

2.) While the couscous cooks, bring a pot of water to a boil. Add the green beans to the boiling water and cook for about 2 mins. Remove the beans from the hot water and immediately transfer them into a bowl of chilled / iced water, to prevent them from over cooking.

3.) Fluff the couscous with a fork and ensure there is no water remaining. Add the beans, olives and sundried tomatoes and toss gently. Tumble in the Feta and chopped Parsley and toss again. Cover and chill in the refrigerator for about 10-15 mins.

Drizzle a little more Balsamic and adjust salt levels as per your preference.

Eat up!

Roasted ONCATOCA Soup

If I told you what "OnCaToCa" was in the beginning of this post... you will most certainly laugh at my (in)ability to come up with creative names...
But I do want you to know about this soup, is that its downright yummers!! And if made with fresh OnCaToCa, it guarantees 100% soup satisfaction :)

Ok, I'm going to kill the suspense right here... it was the shortest name I came up with for Roasted veggie soup I made... with roasted Onions, Carrots, Tomatoes and Capsicum :P  hence the name OnCaToCa... so no, its not some mysterious exotic ingredient that I discovered :)

We enjoyed this soup along side a lovely Couscous salad, the recipe for which comes from Fred, a friend from work who brought this for a potluck party a couple of weeks ago. You will find the recipe for the couscous in the "salad" section of the blog.


Ingredients:
- 3 medium Tomatoes, cut into larg chunks
- 1 red/ yellow Capsicum, deseeded
- 1 large/ or 2 small Onions, peeled
- 1 medium Carrot, peeled
- 1 tsp dried Thyme

- 6-7 leaves, fresh Basil, chopped
- 1/2 cup Vegetable stock
- 3-4 tbsp extra virgin Olive oil
- Salt, Pepper, to taste

Method:
1.) Preheat the oven to 180 deg C. Line a baking pan with aluminum foil. Set aside.

2.) Chop the Onions, Carrots and capsicum into largish chunks, more or less of the same size, to ensure that they cook in the same time frame. Arrange the chopped veggies onto the baking pan. Drizzle with Olive oil. Season with salt and pepper. Roast the veggies in the hot oven for about 20-25 mins, or till they're cooked and slightly charred in parts.

3.) While the first batch of veggies roast, cut the tomatoes into chunks. Season with salt, pepper and thyme. Roast the tomatoes after drizzling them with the olive oil (about 40 mins)
The reason I roasted the tomatoes and the rest of the veggies separately, is that tomatoes have a lot more water, and therefore moisture, before they cook and get slightly charred. This time period is too long for comparatively drier veggies and they will overcook and burn if roasted with the tomatoes.

4.) In a saucepan, bring a cup of water to a simmer and dissolve the stock cube in it. While the water simmers, transfer the roasted vegatables and tomatoes to a blender along with the basil leaves and puree till nice and smooth. Add a little water if it gets too thick.

5.) Pour the roasted vegetable puree into the sauce pan with the water and mix well. Bring to a boil. Adjust seasoning (salt / pepper / thyme) and switch off heat. Let the soup rest for about 5 minutes.

Although this soup is vegetarian, I have also made this with fresh prawns... just season the prawns with salt and pepper & saute a tablespoon of olive oil. To make this more seafood-y puree some of the prawns along with the vegetables in the blender. Add the remaining to the simmering soup right before you switch off the heat. Yum!


Garnish with additional fresh basil leaves and Enjoy with a nice salad or toasted bread. This makes for a delicious, filling and supremely healthy weeknight dinner. Eat up! 


Sunday, August 28, 2011

Chinese Chicken-Noodle Soup (with its Vegetarian variant)

We spent last weekend in picture-perfect Thailand... eating, drinking, diving, eating, swimming, getting massages, eating, lazing on white sandy beaches, eating... you get the general picture ;)
But we are back to our city lives now... and after a couple of days of being depressed about our vacation coming to an end, we're shamelessly scouting locations for our next holiday :)
While we're at that, we really wanted to go easy on our stomachs and eat light after all the delicious food we stuffed our faces with, so I like a good little girl, I turned to Soup!

Not only are soups filling and delicious, they're easy to make and extremely good for you... And all one needs to do, is patiently allow a bunch of ingredients to bubble away in a basic broth, while you can take a shower, change and generally feel more human at the end of a busy work day.
Inspired from recipes I've been reading on South-east Asian cooking, all you need for this dinner-in-a-bowl is, a bunch of ingredients, a hungry tummy and....  a BIG bowl! :)

Ingredients:
- 250g boneless Chicken
(or 1 chopped carrot + 1 cup chopped french beans)
- 3 tbsp Soya Sauce
- 3 tsp rice wine Vinegar
- 2 tbsp Sesame oil
- 2 Garlic cloves, minced
- 2-3 tsp Sesame seeds,
- 2 tsp Ginger, minced
- 1 tbsp Sugar
- 2 cups Cabbage, chopped
- 6-7 Spring Onions, finely sliced
- 2 cups Chicken or Vegetable broth
- 1/2 packet Chinese pan-fry noodles (or whole wheat spaghetti if you cant find noodles)
- 1/4 cup Coriander, chopped

Method:
1.)  Cut the chicken breast into bite-sized pieces. Transfer to a bowl. Add the Soy sauce, rice wine vinegar, and sesame oil, and allow the chicken to marinate in this for about 15-20 mins.

2.) Toast the sesame seeds on a hot pan and grind a little to form a coarse powder. Whisk together the garlic, crushed sesame seeds, ginger, sugar and some vinegar in a bowl. Set aside.

3.) Bring a pot of water to boil on high heat. Add a tablespoon of salt and Cook noodles till tender. Drain.

4.)  Heat the remaining Sesame oil in a large pan. Add the chopped spring onions and saute for a couple of minutes. Add the chopped Cabbage, and saute till the cabbage is tender. (If making this vegetarian, add the chopped carrots and beans at this point, and saute till tender)

5.)  Add the chicken (or vegetable) broth and bring to a full boil. Add the marinated chicken along with the marinade, and the garlic-sesame mixture. Reduce heat and simmer till the chicken is cooked.

6.) Add the noodles and stir in half of the chopped Coriander. Switch off heat.

Ladle the soup into bowls and garnish with remaining coriander. Add some sweet-chili sauce if you like ( I love it!) and Eat up! :)

*A quick note about the chicken/ vegetable broth... It's basically 2 stock cubes dissolved in 2 cups of hot water, or a can of ready to use broth.*

Sunday, July 31, 2011

Sabudana Khichdi

When you're normally used to cooking for 2, no matter matter how much you enjoy cooking, it seems like a chore to do it for myself. At the best time it is the best time to treat yourself to the stuff that you love but your significant other might not miss if not made for a long time :) Today's posts are about the things that I treated myself to in the past week while Vineet was away on a work-trip to India.
Sabudana khichdi is a childhood favorite of mine, and I realised I had'nt eaten it in really long time...So, I made a big bowl and enjoyed it with my dear pal Seema, who came over to spend Sunday afternoon with me.

The only prep you will need to do in advance is to soak the Sabudana (sago) a couple of hours before you plan to cook it.
Calculate 1-1/2 cups of un-soaked Sabudana (sago) to feed two persons a hearty breakfast, or 2 cups if you want to make a meal out of it.


Ingredients:
- 1-1/2 cups Sabudana (raw)
- 2-1/2 cups Water
- 1 cup Roasted Peanuts (coarsely powdered)
- 1 medium Potato, cut into small cubes
- 2 tbsp Olive oil (or ghee)
- 2 tsp Cumin seeds
- 2-3 green Chillies, chopped into 1" pieces
- Salt & Sugar, to taste
- Red Chilli powder, to taste
- Coriander & lemon wedges, to garnish

Method:


1.) Measure out and put the Sabudana (sago) in a sieve. Hold under running water. Transfer the rinsed Sabudana into a large bowl. Pour 2-1/2 cups of water over it and cover and set aside for the next couple of hours till it absorbs the water and puffs up. Toss the puffed Sabudana gently with your fingers. Sprinkle the roasted peanut powder, salt, sugar & red chilli powder. Toss gently to mix well.

2.) Heat the ghee/ oil in a thick-bottomed kadhai/wok. Add the cumin seeds. When they begin to sputter, add the chopped green chillies and fry. Add the cubed potato and saute till they're golden brown and cooked.

3.) Lower the heat and add the Sabudana-peanut mixture to the tempering. Stir to coat the Sabudana in the tempering. Cover and allow mixture to cook over a gentle heat. Switch off the heat and keep covered to let the steam work its magic.

4.) Serve garnished with Coriander and lemon wedges. Is also delicious when eaten along with some chilled plain yoghurt. Eat up!


Saturday, July 16, 2011

Spinach-Grape-Pecan Salad

Made this for dinner last night, since I wanted something crisp and light at the end of a rather hot day.
I had come across a recipe a while ago, that used - Arugula leaves, Pecans and Pomegranate in a salad - that I wanted to try... But, I dint want something as peppery as Arugula... so I decided to use Baby Spinach. Then I couldn't find any Pomegranate, so I thought, why not Grapes? and luckily, I did find the Pecans ... but before I knew it , I  had substituted all of the ingredients from the original recipe, and ended up doing my own thing :) The result was a fresh, light , crisp Salad that is perfect with grilled / barbecued chicken / lamb, or even just on its own!

Ingredients:
- 3 fists-full, Baby Spinach leaves,
- 1-1/2 cups Black or Red seedless Grapes, halved
- 1 cup Pecans, roasted & roughly chopped
- 1/4 cup Feta Cheese, crumbled
- 1/2 cup fresh Mozzarella balls in water
- 1/4 cup Extra-virgin Olive oil
- 5-6 tbsp Balsamic Vinegar
- 1 tsp Lemon zest, freshly grated
- 1 tsp Salt


Method:
1.) Wash the baby Spinach leaves in chilled water and drain.

2.) Toast the Pecans (nuts similar to Walnuts) on a non-stick pan or in the oven. Allow them to cool down and give them a rough chop. Add to the Spinach leaves.

3.) Remove the mozzarella balls from their water and drain. Cut into chunks ( Fresh Mozarella is a soft milky cheese... a lot like fresh Paneer) and add to the salad bowl along with the crumbled Feta cheese and Grapes.

4.) Whisk together the Olive oil, Balsamic vinegar, Salt & lemon zest to form the dressing. Pour over the salad and toss gently to mix. Eat immediately or cover and chill in the refrigerator till its time to serve.

Sunday, July 10, 2011

Eggless Coffee Cake with Baileys & Chocolate frosting & Toasted Almonds

My first Eggless Cake! :) Have been wanting to try eggless-baking, since I have a couple of friends who are pure vegetarians. My research on the same surprised me, since I discovered that the substitute for eggs were a few tablespoons of simple vinegar...nothing fancy! :)
I flavoured the cake with instant coffee, and used brown demerara sugar instead of regular white sugar, for the slightly smokier flavour it has. The frosting is chocolate spiked with Bailey's Irish Cream, my favorite liqueur...with toasted flaked almonds that I patted onto the cake, to make it this cake even more decadent! :)

Btw, a big thank you to Rahul, my dear brother, for getting me the lovely cake platter as a birthday present! :)

PART- I : THE CAKE

Dry Ingredients (for cake):
- 2 cups Cake flour (maida)
- 1/3 cup instant Coffee powder
- 1-1/4 cups Demerara sugar
- 2-1/2 tsp Baking powder
- 1/3 tsp Salt
Wet Ingredients (for cake):
- 1-1/3 cups Water
- 2/3 cups Vegetable oil
- 2-1/2 tsp Vanilla extract
- 2-1/2 tsp Vinegar


Method for Cake:

1.) Preheat the Oven to 190 deg C. Sift the flour,coffee powder, baking powder and salt. Add the sugar and mix gently to distribute evenly.

2.) In a seperate bowl, whisk together the Water, Oil and Vanilla extract. Make a 'well' in the bowl with the dry ingredients. Pour a little of the Water-oil mixture into in and stir gently to mix. Keep adding the liquid mix little by little and mix gently until well combined.
Be careful about not over-mixing or the cake with bulge in the middle as it rises in the oven.

3.) Pour the batter into a prepared 9" round cake tin. To prepare the cake tin, rub the insides with a few drops of oil. Dust with a teaspoon of flour to coat the surface evenly. Alternatively, use a non-stick or teflon-coated cake tin.

4.) Stir in the vinegar into the batter, just before you pop the tin into the oven. Bake at 190 deg C for about 50-55 mins, or till a cake tester comes out clean. Let the cake cool down. Loosen the cake from the tin and remove gently. Place on a wire rack and allow the cake completely before you begin frosting it.


PART- II : THE FROSTING

Ingredients:
1 cup semi-sweet Chocolate chips
1/4 cup unsalted Butter, at room temperature
4-5 tbsp Baileys Irish Cream liquer
1 cup Almond flakes, toasted on a pan or in the oven

Method: 
1.) Heat a large pan with water. Place the chocolate chips in a glass bowl and immerse the hot water. Melt the chocolate chips by stirring gently. Add the Baileys into the melting chocolate. Remove from heat and allow the chocolate to cool a little.

2.) Add the butter into the chocolate. Whip using an electrical beater on medium and then high speed. Continue beating till the mixture thickens slightly. Chill the frosting in the refrigerator for about 10 mins.

3.) Lay the cake onto the serving platter. Line the sides with paper towels to protect the plate from any accidental drips. Slather the frosting onto the cake using a rubber spatula or any other broad-flat spoon.

4.) Cool the cake in the refrigerator while you toast the almond flakes on a non-stick pan or in the oven, till they're golden brown. Sprinkle the almonds all over the cake and 'pat' gently to make sure that they hold onto the frosting.


 Chill the cake in the refrigerator, and remove about 10 mins before you plan to serve it, so that the frosting is firm yet soft....


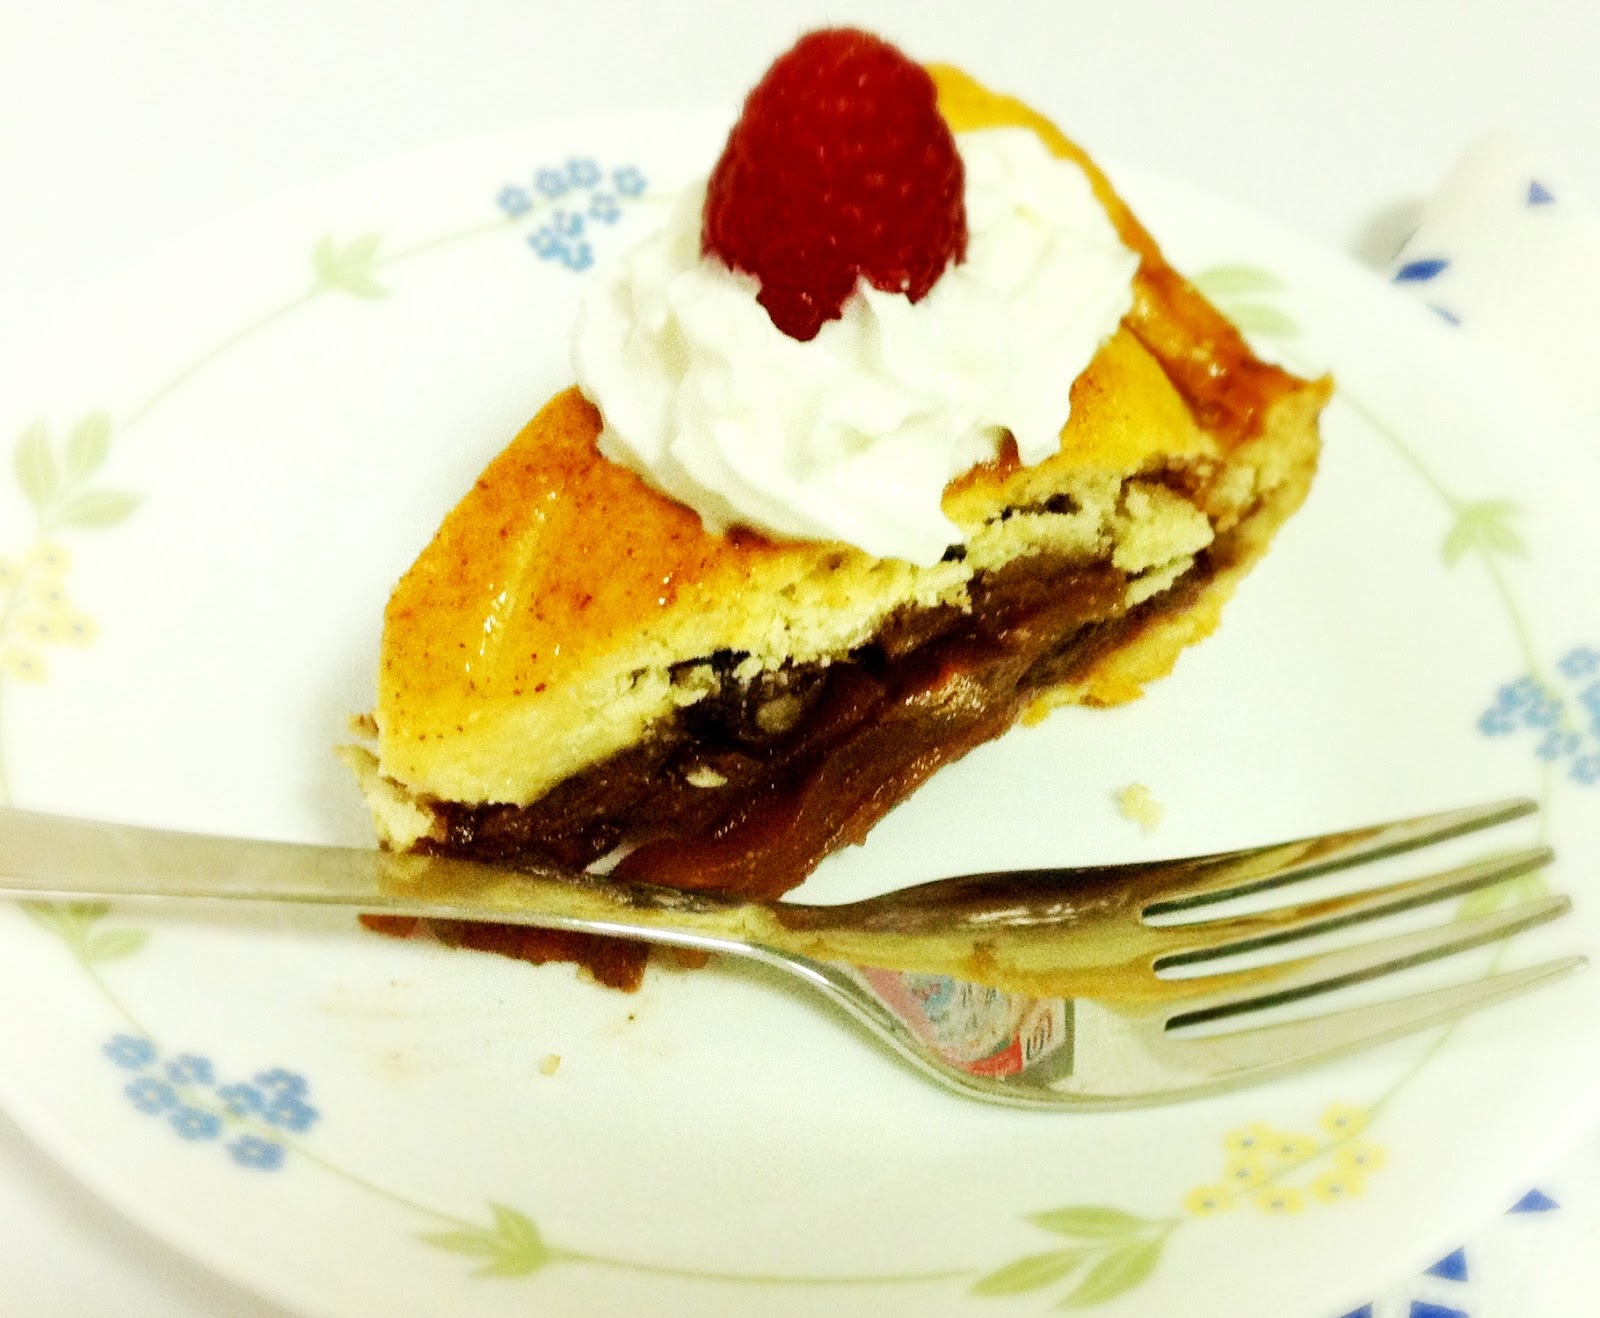
I  was very pleased with the results of my first eggless cake... and although I love eggs in baked goods, I plan to experiment more for the benefit of my friends who dont :) 


Happy eating! :)

Tuesday, June 21, 2011

Herb-Roasted Tomato & Basil Soup

Its Tuesday. Saturday is THREE whole days away. Work has been slightly busy since I have a presentation coming up at the end of this week, and I wanted to keep dinner as simple as possible, and in sync with our on-going resolution to eat healthy (excuse the chocolate mousse, but we have our weak moments!)
Soups are the easiest and healthiest route to a filling, delicious dinner for Vineet and me. The large batch of tomatoes stashed in the fridge (that were beginning to go soft!), made our decision much easier. This is a slight twist on a traditional tomato soup. Its loaded with the goodness of carrots, celery and (ofcourse!) tomatoes with the fresh basil giving it a beautiful peppery flavour. Enjoy!

This recipe is quantified to make 4 medium or 3 large bowls of Soup.

Ingredients:
- 5 nos. medium Tomatoes
- 2-3 cloves Garlic,sliced
- 1 large Onion, diced
- 1/2 cup Celery, diced
- 1/2 cup Carrots, diced
- 10-12 fresh Basil leaves, chopped
- 1 -1/2 tbsp Extra-virgin Olive oil
- 1-1/2 tbsp Olive oil (to sautee veggies)
- 1 tbsp Dried Thyme
- Cracked Black pepper &
- Salt to taste


Method:
1.) Pre-heat the oven to 180 deg C. Take 4 of the tomatoes. Cut into quarters. Lay out onto a baking tray. Drizzle the extra-virgin olive oil over the tomato. Dust the tomato wedges with the dried thyme. Roast in the oven for about 40 mins.

2.) Meanwhile, Heat the Olive oil in a saucepan. Saute the chopped Garlic and Onions till soft. Add the Celery and carrots and saute. Cover the pan with a lid and let the veggies "sweat" and cook in their own steam.

3.) Chop the 5th tomato into chunks. Discard seeds. Chop the basil leaves. Add the chopped tomato and basil leaves to the saucepan and replace the lid. Cover and cook till the carrots are soft enough to mash with the back of a spoon. Switch off the heat.

4.) Dissolve the soup cube in 1/2 a cup of hot water. Transfer the Sauteed veggies to a blender. Puree on pulse mode. Add the dissolved soup cube & water, and the roasted tomato wedges. Add a little more water (another 1/2 cup) and blend till the soup is thick and smooth.

5.) Transfer the blended soup back into the saucepan. Drizzle an additional 1 tbsp of extra-virgin olive oil on top if you like (i do!). Pour the milk into the soup and bring to a full boil.

6.) Garnish with a sprig of basil leaves and enjoy with some toasted bread! :)


Monday, June 20, 2011

Pasta Salad with Tomatoes & Olivada with Yoghurt marinated Grilled Salmon

Weekends are god's way of showing us that he loves us...It gives us the extra time to do stuff that we put off on the other 5 days of the week - like spring cleaning, doing laundry, catching up on sleep, and....guiltily updating your cooking blog that is 2 weeks overdue :(
For a while now I've been trying to experiment with Salads that are more "main course". I came across some very interesting Pasta salad recipes on Epicurious.com, and these seemed to be a perfect choice for main-course salad meals. This Pasta Salad with peppers, tomato and Green Olivada, is all vegetarian, and we enjoyed this served with a grilled fillet of Salmon. Needless to say, it was a very satisfying meal, and a nice break from our usual weeknight dinner :)


PASTA SALAD WITH PEPPERS, CHERRY TOMATOES AND GREEN OLIVADA


Ingredients for Olivada:
1 large clove Garlic, peeled

1/2 cup pitted Green Olives, roughly chopped
1/2 cup pitted Kalamata Olives, roughly chopped,
2 tbsp Capers, drained
1 tbsp Red wine Vinegar
1 tbsp Dijon mustard
1/2 tsp Red chilli flakes
1/4 cup Extra-virgin Olive oil

Ingredients for Salad:
1 cup Whole-wheat pasta ( I used Fusilli)
1 cup Cherry tomatoes, halved
1/2 cup fresh Mozzarella balls
2 tbsp fresh Oregano / or Basil, chopped
1 Red bell pepper (capsicum), finely sliced


Method for Olivada:
1.) Mince the garlic clove in a food processor. Add the Olives, capers, and all other ingredients except the Olive oil.
2.) Process on 'pulse' mode till chunky. Add the olive oil little by little and puree the mixture into a thick-ish paste-like consistency. Set aside.

Method for Salad:
1.) Cook the pasta in salted boiling water till its cooked, but not too soft and still has some 'bite'. Drain the hot water and pour chilled / iced water over the cooked pasta to keep it from cooking with any residual heat. Let it drain and transfer to a large mixing bowl.
2.) Drizzle the pasta with some extra virgin Olive oil and season with freshly cracked pepper and gently toss to coat.
3.) Add the halved cherry tomatoes, sliced bell peppers (capsicum) and mozzarella balls.
4.) Add the Olive paste (Olivada) and toss to coat the pasta and vegetables. Best served chilled.

YOGHURT MARINATED GRILLED SALMON FILLET

Ingredients:
350 g x 2 nos, Salmon fillets
1 cup Yoghurt (slighly sour)
1-1/2 tbsp Cumin powder
1/2 tsp Turmeric powder
1 tsp Red chilli powder
1 tsp Ginger-garlic paste
1 wedge of lime
Salt, to taste


Method:
1.) Mix the yoghurt with the rest of the spices and other ingredients. 
2.) Rinse the fillets under running water and pat dry. Make 1/2" deep slits in the flesh of the fish. 
3.) Rub the marinade all over the fillet and allow it to marinate for atleast 2 hours or preferably overnight.
4.) Heat the grill. Shake of excess marinade from the fillet and grill under high heat till nicely browned to your liking... I like the meat to be slightly scorched in parts... yum! Allow the fish to rest for a few minutes. Squirt some lime juice and Eat up!